KEY TAKEAWAYS
- Always wear safety gear and never work alone on the roof. Keep someone around to help.
- Use correct prying methods to avoid damaging the roof decking.
- Accurate roof measurements help avoid costly material waste or delays.
- Install underlayment flat with proper overlap to prevent water leaks.

According to the National Safety Council, about 500,000 individuals sustain ladder-related injuries each year, many during home improvement projects like roofing. Accessing the repairs or installation of roofing may seem very simple, but it will require skill, strength, and a great deal of attention regarding safety.
It’s not as simple as throwing some new shingles on the roof; it’s a process you must move through with careful considerations, regarding all the technical aspects of what will become one of the most important elements of your home.
In this article, we will highlight some roofing tasks that may challenge your skill level–and how to perform them if you were a pro.
Removing Old Shingles Without Damaging the Roof Deck
Careful technique and tools are required to remove old shingles in a way that does not damage the roof deck. The first step to remove shingles is called “prying up” the shingles. It involves carefully using a flat pry bar to loosen up the shingles.
Prying from up top down allows you to avoid bending the roof deck or plywood. Still be careful, as you want to avoid nails or other fasteners damaging the underlying decking. Remember to remove fasteners slowly and gently, avoiding jerks or twists, as this can easily pull the wood up.
Use proper technique where you can and remember that, in some cases, the edges of the shingles are near more sensitive areas of the deck (valleys, sides), and the decking can be bent more easily. In cases where the underlayment or peel-and-stick is stuck to the roof deck, peel slowly to avoid tearing off parts of the wood decking.
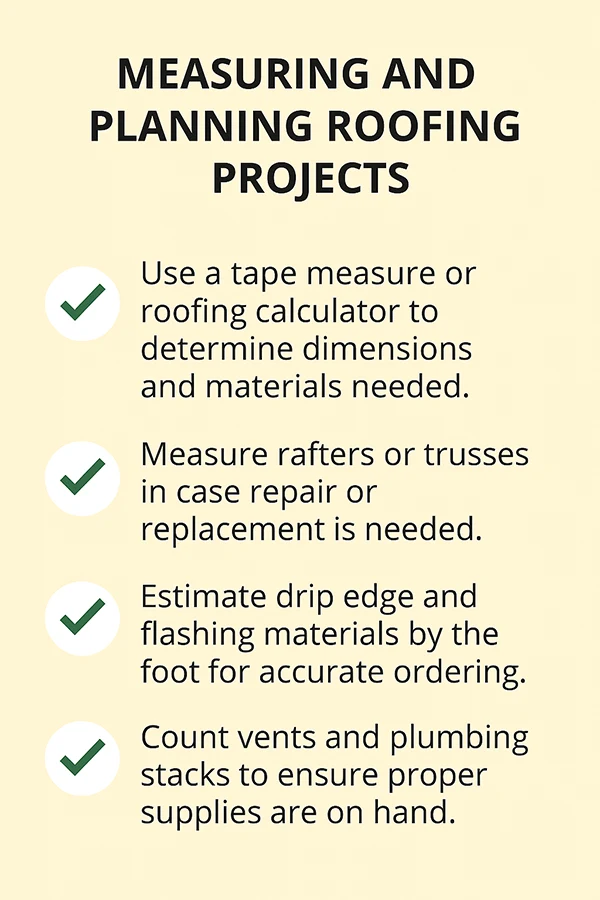
Measuring and Planning Materials With Precision
It is important to measure and plan the materials for a roofing project accurately. The first step is to thoroughly measure every aspect of the roof. This includes the valleys, hips, ridges, overhangs, and anything else.
It may be a good idea to have a roofing calculator in addition to or instead of a tape measure. It is important to measure your roof accurately because if it is wrong, it could result in real expenses in remade materials or a late on a job because of a lack of materials to finish the job and incur additional costs.
Err on the side of caution and overorder materials by obtaining extra shingles to compensate for cuts and overlaps. Whether it is nail, flashing and drip edges, vent components, and/or underlayment, always have a list. Below, you can get some useful tips.
Installing Underlayment Correctly
Properly installing underlayment is the next step in the process of assuring the roof stays compliant from any moisture and weather damage when it’s completed. It is best to start on a clean, dry roof deck to allow proper adherence.
Apply the underlayment by rolling it horizontally, from the bottom edge to the top edge, and make an overlap of at least 2 to 4 inches with each layer. Use cap nails and/or staples (depending on the product and local building codes) every few feet.
Take special care at valleys, eaves, and at penetrations, using more waterproofing membrane if necessary. Make sure to install your underlayment flat, without wrinkles or bubbles (if the underlayment has bubbles in it, it can allow water to intrude).
Flashing Work Around Penetrations
Flashing work around penetrations like chimneys, vents, skylights, and pipes is vital in preventing water leaks and providing a watertight roof system. Start with the selection of flashing material; aluminum or galvanized steel is typical, but any suitably flexible and durable material should work, so long as it is bent correctly around the penetration.
The flashing should be fitted below the shingles above the penetration (to direct water away) and above the shingles below the penetration (to not impede water flow) for optimal water diversion away from the penetration.
Apply roofing sealant to seal various joints and edges where required, but NEVER depend solely on sealant to waterproof the penetration. Use step flashing on sidewalls and chimneys, while pipe penetrations use boot flashing (iem, rubber boot around pipe).
PRO TIP : Before laying shingles, mark roof sections with chalks to ensure straight, even alignment throughout.!
Ridge Cap Installation and Final Sealing
The roofing process is concluded by installing the ridge cap and trimming as necessary. Proper ridge cap installation and sealing are an important part of protecting the peak of the roof, which is often the most vulnerable section of the roof.
To begin installing the ridge cap shingles, lay them on top of the ridge of the roof with an even overlap as you build from one side to the other to help shed away water. Each cap will be nailed down as you go, making sure each fastener is always below the overlap line.
For ventilation, the ridge vent should be properly installed and finalized before placing the ridge caps on top. Once the ridge caps are installed, it is good to go back and place roofing sealant where appropriate on the seams and nail heads.
Managing Safety Gear and Weather Risks

Taking care of hazards related to safety equipment and the weather is vital in preventing accidents when roofing, especially for the confident DIYers who are doing the job themselves. For example, ensure that you wear a safety harness attached to a secure anchor point as well as non-slip boots, gloves, and a hard hat.
When working on a steep slope, use roof jacks and guardrails to limit the possibility of falling. Check all ladders to ensure stability, and never work alone. Even a professional with experience could use a partner to ensure safety.
What is the best way to remove old shingles without damaging the roof deck?
Use one hand on the positive end of a flat pry bar and work from the top down. Avoid jerking motions and remove nails slowly to protect the decking.
How do I measure for roofing materials before starting a DIY job?
Make sure to measure all valleys, ridges, and overhangs correctly. Also, consider the use of a roofing calculator and always over-order roofing materials to allow for waste and cuts.
Why is the installation of underlayment crucial in roofing projects?
The underlayment is important to your roofing project because it can prevent unwanted moisture from damaging roofing materials.