Stepping through your back door welcomes you to what feels like a luxury resort. Sure, it may not have cost the same amount as a weekend retreat, but it’s an experience that will keep you thinking about the great time you spent there. My journey of exploring new ideas and trends in home design has shown me that the most impactful changes come from creativity rather than money.
So whether you want to make your home more attractive to future buyers or just want to have a beautiful place to relax and watch the sun set. Below are 13 inexpensive but effective ways to create more livable space in your backyard. In my opinion, beautiful gardens shouldn’t be viewed as a luxury; they’re merely the canvas for our stories.
Key Takeaways
- Minor updates, such as adding new mulch and rearranging your outdoor lights, can greatly improve how much someone is willing to pay for your house.
- Using native plants and creating a compost system at home, for example, will help you save on both labor and water in the long run.
- Dividing your yard into zones allows it to look bigger and be more organized than if it didn’t have zones.
- Upcycling materials and concentrating on “weekend warrior” type projects means you are saving on labor costs while giving the house some very unique character.
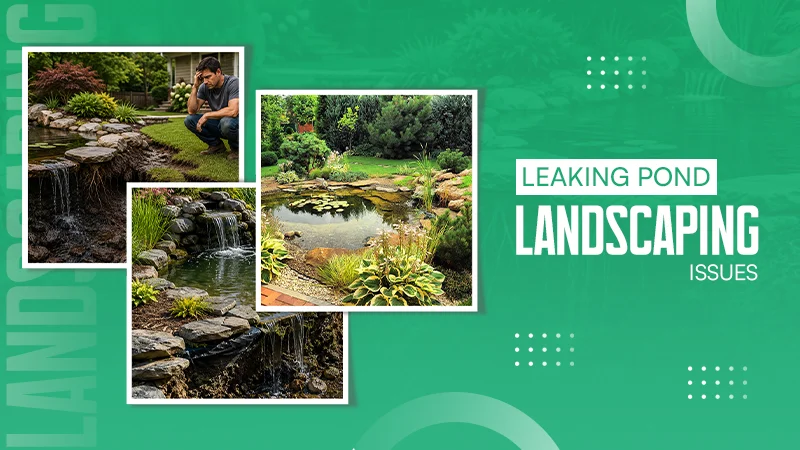
Why Backyard Upgrades Add Value to Your Home
A home’s foundation is its strength, but the backyard is its soul. In fact, buyers respond strongly to the sanctuary effect created by a beautifully landscaped outdoor environment.
Increasing the Value of Your Home With Improved Exterior Living Space, Health and Wellness Improvement Effect On The Environment. Making sure you invest in your yard will make sure you have a safe and unwan area where you have added only more stress and difficulty.
Simple DIY Landscaping and Garden Enhancements
You don’t need a professional crew to give your garden a facelift. I’ve found that a few hours of “sweat equity” can yield results that look professionally curated.
- Create clear edges between your lawn and your flower beds by using a basic shovel or old bricks. A layer of mulch is an instant upgrade to your garden and keeps water for the flowers.
- Use plants that prefer the weather conditions of your region, as they need less water and fewer chemicals.
- When placing plants on a wall or fence, make sure they are in an area with less sunlight, so you can save on ground space and have beautiful green plants.
- Use old pallets and hanging containers to plant your herbs up high on a fence.
For this type of work, get site-specific advice from local experts, like paving companies Auckland, who understand Auckland’s rainfall patterns and council requirements.
Functional Outdoor Living Improvements
A functional design is a design that allows you to transition easily between relaxing and entertaining.
- You can create an attractive focal point on cool evenings by using heat-resistant rocks and a little bit of gravel.
- Gravel is an inexpensive, permeable alternative to cement that provides a rustic, charming texture to your backyard.
- These steel tanks are very popular right now because they give an industrial chic look while providing cheap cooling options.
- By having a specific place for your potting or DIY projects, the rest of your yard remains free of clutter.
For a second opinion and detailed waterproofing design, engage Christchurch roofing contractors who understand Canterbury wind zones, rainfall patterns, and council expectations.
Creative and Aesthetic Backyard Upgrades
It’s in the details where the magic happens—the little finishing touches that give a yard its unique flair. The expression goes that “one man’s trash is another man’s treasure,” so any of these upgrades will help you show off your style and vision.
- Hang Solar Lights: Create a cafe-like atmosphere in your backyard with string light fixtures strung between trees or along walls. You may even be able to install chandeliers using solar-powered fixtures.
- Paint Your Fence with Bright Colors: Your fence may be the largest element of your yard, so it should stand out. Consider spray painting the entire fence in a bright color (neon green is an excellent choice). If you would like a more natural look, you could also choose to use a semi-transparent stain.
- Recycle Furniture: If you have wooden furniture that you no longer use, repainting it in a bright color will help give it a new life. For instance, consider using bright pink paint on a thrifted pine chair so it will act as your statement piece instead of your old chair.
- Setting Up Bird-Catching Stations: Providing birds with clean water and food will make them feel at home in your backyard and add life and music to the overall garden.
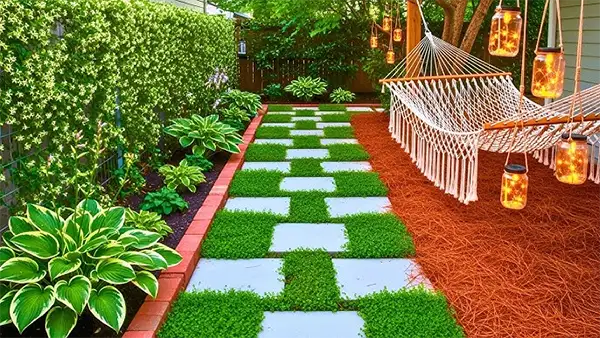
- Pathways: Use either concrete stepping stones or reclaimed slate to create a path through your yard and lead guests to their final destination in the most visually pleasing way possible.
How to Plan Backyard Projects on a Budget
The success of DIY is based on 90% planning and only 10% physical work. I suggest you create a “master plan” before you begin to keep impulse buying to a minimum. I would not attempt to do all 13 projects in one month – do one project a month, so you can spread out your cash and labour.
Purchase outdoor furniture in late summer when all retailers are trying to clear their stock, and purchase plants in late autumn when they are also on clearance. Take cuttings from existing shrubs that you may have, or exchange seeds for new plants with your neighbours. Work on the areas that you see the most of, such as looking from your kitchen window or directly outside your back door.
Tools and Materials You’ll Need for DIY Projects
Every time before going to the local hardware store and making any of your own pieces of furniture or fences, you should know exactly what supplies are already available in your garage. The right tools don’t just helpso saves time and money! Just look for:
- The Basics: A good pair of shears, just like we talked about earlier, is a must.
- Measuring Tools: A tape measure and a level to make sure your projects are levelled.
- Power Tools: Cordless drill and circular saw will help you build just about any kind of post or piece of furniture you’re making.
- Protective Gear: Finally, make sure to always wear an apron and goggles if at all possible otherwise, a “weekend warrior” may find themselves on crutches at the emergency room.
Note Do not attempt all 13 upgrades simultaneously; complete one isolated zone per month to properly balance tool rental fees and physical labor.
Conclusion
According to rent fond design trends, the best way to achieve a “joy-filled basement”, and therefore, a “joy-filled home”, is to create a backyard with as much plant life as possible.
Creating your dream yard is not dependent on winning the lottery; it only requires a little bit of imagination and some free time. Albert Einstein once said, “If you look deep enough into nature, you will see all of life.” By investing in your backyard today, you are securing a venue for creating meaningful memories later in life.
FAQs
What is the least expensive way to make a patio?
A gravel or pea-gravel patio can be made for a fraction of the price of concrete or pavers and will take one of the few improvements that “grow” in value over time.
Will painting my fence actually last?
Yes, if you use a high-quality exterior stain or paint designed for wood, it can protect the structure and look fresh for 3-5 years.
Can I really increase my home’s value with just plants?
Absolutely. Mature, well-maintained landscaping is one of the few improvements that “grows” in value over time.
Do solar lights work in the winter?
Solar lights will work in the winter thanks to updated solar technology, which can collect more available light than previous versions, but they may not last as long per day as they would during the summer months.