A pond waterfall adds elegance, movement, and life to any backyard or garden. The gentle sound of flowing water instantly transforms your outdoor area into a peaceful sanctuary. Building one may seem complicated, but it is an achievable weekend project for most homeowners.
Why Add a Pond Waterfall to Your Garden?
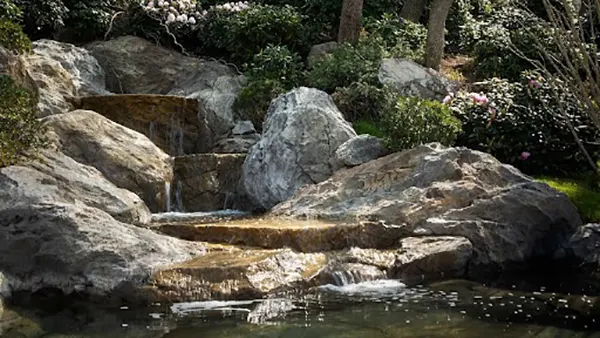
Before diving into the steps, it is worth understanding why a waterfall can be such a wonderful addition to your space:
- Aesthetic Appeal: A waterfall adds a stunning visual focal point to your garden.
- Natural Sound: The sound of trickling water creates a calming atmosphere and reduces stress.
- Wildlife Attraction: Birds, butterflies, and frogs are naturally drawn to running water.
- Oxygenation: Waterfalls improve water circulation, keeping ponds cleaner and healthier.
- Sustainability: Solar powered accessories from Poposoap eliminate energy costs and help the environment.
Step 1: Plan Your Design and Location
Every successful pond waterfall starts with a clear plan. Choose the area of your garden that receives partial sunlight and can easily accommodate a pond and a small cascade. The site should be slightly elevated so gravity can help the water flow naturally.
Sketch your design, including where the pond, waterfall, and rocks will go. Think about how the feature will blend with plants, walkways, and seating areas.
Step 2: Gather Your Materials and Tools
You do not need expensive or specialized equipment to build a beautiful waterfall, especially when using a complete pond waterfall kit that includes all the essential components for easy installation.
- Pond liner or preformed pond basin
- Submersible pump such as the water pump for solar
- Flexible tubing for water circulation
- River rocks, flat stones, and gravel
- Sand and soil
- Small shovel and level
- Solar panels for power (if using Poposoap solar accessories)
- Water plants (optional)
- Decorative lighting
Step 3: Mark and Dig the Pond Area
Use a rope or spray paint to outline the shape of your pond. Once you are satisfied with the layout, start digging. For small ponds, a depth of about 18 to 24 inches is enough. If you plan to keep fish, dig at least 3 feet deep to help maintain stable temperatures.
Make sure the bottom is level and smooth. Remove sharp rocks or roots that might damage the liner.
Step 4: Install the Pond Liner
Lay the pond liner inside the hole, making sure it covers all sides with extra overlap around the edges. Press it firmly against the ground and smooth out wrinkles. You can place a layer of sand underneath for added protection.
Fill the pond partially with water to check if it sits evenly and securely. Adjust the liner if needed before moving to the next step.
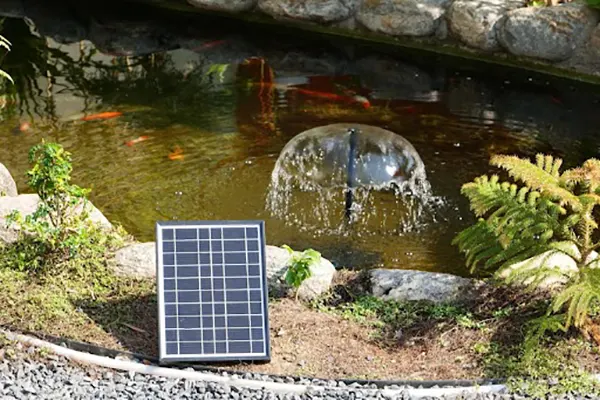
Step 5: Set Up the Pump and Tubing
The pump is the heart of your waterfall. A solar powered waterfall pump is an excellent choice for maintaining steady water flow while reducing energy costs and eliminating the need for electrical wiring.
Place the solar pond pump at the bottom of the pond in a stable position. Connect the tubing to the outlet of the pump and run it toward where the top of your waterfall will be. Make sure the tubing is hidden behind rocks or under soil to maintain a natural look.
Step 6: Create the Waterfall Base
Build the foundation for your waterfall using large, flat rocks or bricks. The base should gradually rise from the pond’s edge to create a gentle slope. Stack the stones securely and check the stability at each level.
Use smaller stones and gravel to fill any gaps and hold everything in place. The water should flow smoothly from one level to the next.
Step 7: Install the Waterfall Spillway
The spillway is the point where water exits the tubing and flows down the rocks. You can create a natural spillway using flat stones or buy a preformed waterfall feature. Position it at the top of your rock structure and secure it firmly.
Ensure that the water flows evenly over the surface without splashing excessively. Adjust the stone angles if needed to direct water back into the pond.
Step 8: Test the Water Flow
Before finalizing your design, test how the water runs through your waterfall. Turn on the fountain pump and observe the flow. Make sure water returns smoothly to the pond without leaking or overflowing.
If you notice uneven flow, adjust the rocks and tubing. This step may take a bit of patience, but it is crucial for achieving a natural and pleasing result.
Step 9: Add Decorative Elements
Once your waterfall flows beautifully, it is time to enhance its appearance. Add decorative stones, pebbles, and aquatic plants around the edges. Place small shrubs or flowers nearby to integrate the pond with the rest of your garden.
For nighttime beauty, install Poposoap pond lights. These solar powered lights illuminate the water at night, creating a stunning and peaceful glow without increasing your electricity bill.
Step 10: Fill the Pond and Finalize the Setup
Completely fill the pond with clean water. Wait for a few hours to let it settle, and check for leaks or air bubbles. Trim any excess liner and cover the edges with stones for a polished look.
Add fish or plants if desired. Ensure your pump and solar panel are in full sunlight to charge efficiently. A well-positioned solar pond pump will circulate water quietly and continuously.
Step 11: Maintain Your Pond Waterfall
Regular maintenance keeps your pond waterfall healthy and looking beautiful. Follow these simple guidelines:
- Clean the Pump Regularly: Remove debris or algae from the Poposoap solar pond pump every few weeks.
- Check Water Levels: Refill as needed to replace evaporated water.
- Trim Plants: Overgrown plants can obstruct water flow or drop debris into the pond.
- Inspect Rocks: Ensure rocks remain stable, especially after heavy rain.
Additional Tips for Success
- Keep It Simple: A small, well designed waterfall looks better than an overly complex one.
- Use Natural Materials: Real stones and plants create a more organic look.
- Avoid Deep Ponds for Beginners: Shallow ponds are easier to clean and maintain.
- Add Wildlife Features: Place small rocks or logs near the pond to attract frogs and birds.
- Balance Light and Shade: Too much sunlight encourages algae, while too little limits solar charging.
Why Choose Solar Powered Accessories for Your Pond
Traditional electric pumps and lights require wiring, which can be messy and costly. Solar powered systems like those from Poposoap offer several benefits:
- Eco Friendly: They use renewable energy from the sun.
- Cost Effective: No electricity bills or expensive installation.
- Easy Setup: Place solar panels in a sunny spot, and the system runs automatically.
- Safe for Families: No risk of electric shock near water.
- Low Maintenance: Solar systems need minimal upkeep.
The Beauty of a Homemade Waterfall
A pond waterfall brings the natural rhythm of water into your daily life. It provides relaxation, boosts mental health, and enhances the value of your property. Building it yourself makes the experience even more meaningful, especially when done with family or friends.
Watching water flow gently over rocks with the help of a Poposoap waterfall pump, while birds sing nearby, creates a serene environment that no artificial decoration can match. The combination of natural beauty and solar innovation makes this project both enjoyable and responsible.
Troubleshooting Common Waterfall Problems

Even with the best setup, you may encounter small issues. Here is how to fix them:
- Weak Water Flow: Clean the pump filter or reposition the solar panel for better sunlight.
- Leaks: Check liner placement and ensure water flows back into the pond.
- Algae Growth: Add more shade or water plants to balance sunlight.
- No Lights at Night: Ensure your pond lights receive enough daylight to charge fully.
Addressing these small problems promptly will keep your pond waterfall running smoothly year round.
Last Thoughts
Building a pond waterfall in your garden is one of the most rewarding DIY projects you can undertake. It combines creativity, relaxation, and sustainability in one simple design. By following these 11 steps and using reliable solar accessories, you can create a beautiful, energy efficient water feature that lasts for years.