Having a surveillance camera is a must for home security. Homeowners do install camera systems in every edge of their house.
However, one thing they forget to prioritize is its timely inspection. Many homeowners ignore their drains, thinking they are not a problem.
One day, all of a sudden, a minor issue becomes a major blockage that ruins their weekend. A simple camera check can show what is really happening inside your pipes.
It will prevent expenditure on trial-and-error fixes. Even the system shows warning signs for you, which you might not be focusing on.
Want to know about those warning signs? Here are seven clear signs that indicate it’s time to inspect your drains.
Along with it, you will get advice on when you can fix it yourself and when you should hire a professional.
Let’s move further to discover!
KEY TAKEAWAYS
- Keep a note of camera inspection warning signs.
- Understand the difference between DIY and professional help.
- Take proactive measures by developing preventive habits.
- See what a camera actually shows.
1) Recurring Clogs in the Same Fixture
If the same tub, sink, or laundry standpipe clogs again within weeks, you are beyond surface debris. A plumbing camera can confirm whether you are dealing with a partial blockage, a malfunctioning fitting that catches lint, or a “belly” that holds water and sludge.
2) Gurgling and Slow Drains Across Multiple Fixtures
Random gurgles and persistent slow flow often point to venting difficulties or a downstream restriction. Video makes the difference: you will see whether the line is pinched by scale, grease bands, or roots.
3) Sewer Odors That Come and Go
Intermittent sewage smells are classic for dried traps—but they can also symbolize cracks or offsets letting sewer gas leak. A drain camera analyzes those joints and shows you the specific defect and location.
4) After You’ve Cleared a Clog, But Don’t Know Why It Formed
Snaking changes the flow but does not answer “what caused it.” Filming immediately after clearing lets the lens reach farther to find the root cause (literally, in root-intrusion cases) while the line is open.
5) Trees near Laterals or Older Clay/Iron Piping
Mature trees are looking for moisture; tiny root hairs can enter joints and construct rope-like mats. Schedule a look every year or two to stay ahead of regrowth if your home has outdated clay or cast-iron laterals.
6) New-to-You Home or Remodeling Plans
Before you add bathrooms or relocate a kitchen, diameter, verify slope, and overall condition. A recorded inspection doubles as documentation for permits or future resale.
7) Ground Movement, Settling, Or Driveway Heaves over the Line
Shifts above ground occasionally signal changes below. An inspection camera helps confirm cracks, offsets, or bellies so you can target repairs to the exact section.
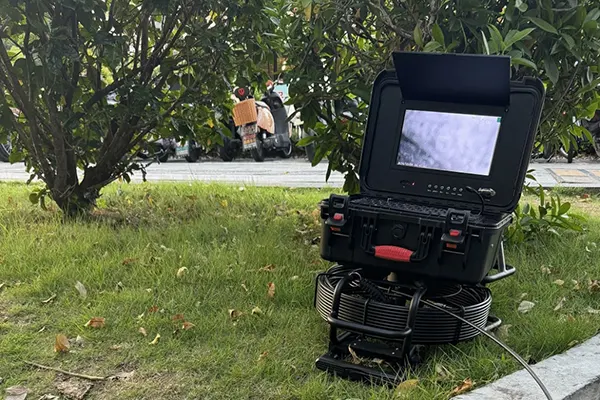
DIY Vs. Professional: A Quick Decision Framework
- Choose DIY if you are checking short residential runs (50–100 ft), mainly plastic piping, and you just need visual indications of scale, grease, or a simple obstruction.
- Look for accessories that make DIY easier: self-leveling (keeps the image upright), IP68 waterproofing, a distance counter (so you know where the issue is), and an optional 512 Hz transmitter for surface locating later.
- Handy for routine maintenance checks after a clog is cleared.
- Choose a Pro if you suspect structural defects (offset joints, collapses), have multiple sharp turns, long laterals, or you require a stamped report with repair recommendations and precise locate marks.
Tip: Record the session. Whether DIY or pro, a downloaded video is gold for future comparisons and quotes.
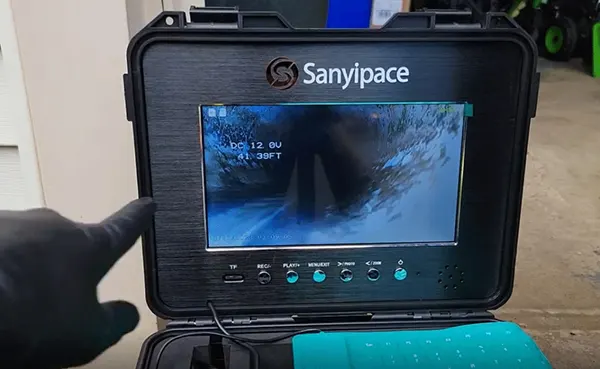
What the Camera Actually Shows (And How to Read It)
- Grease bands: matte, dark rings at the water line—common in kitchens with heavy cooking.
- Scale & corrosion: rough-textured, flaky interior on older cast iron; debris snags easily.
- Bellies: a stable waterline the lens navigates under and then emerges from.
- Offsets/misaligned fittings: a visible “step” at a joint where paper catches.
- Roots: fine hair-like threads at first; later, they appeared like a net.
A self-leveling sewer camera keeps “up” truly up, so slopes and waterlines are instantly readable—no analytical gymnastics.
Preventive Habits That Actually Work
Here are some preventive habits that will help you get the desired results.
- Cool fats in a can, never put them in the sink.
- Strainers in kitchen and shower drains.
- Annual or biennial camera check if you have had roots, bellies, or chronic grease.
- After any major clog, take 10 extra minutes to film while flow is restored—find the cause, not just the symptom.
Cost Snapshot: Rental Vs. Buying Vs. Calling a Pro
The complete breakdown of the costs below will help you make the right decision:
- Pro inspection: Often charged as a service call; it is valuable to locate marks and a formal report.
- Short-term rental: Good for one-off reminders, but costs add up if you check more than a couple of times a year.
- Buying a homeowner-friendly unit: Pays off if you want periodic checks, have multiple issues of fixtures, or manage rentals.
Bottom Line
If you are seeing slow drains across rooms, repeat clogs, or mystery odors, do not guess—look. A 10-minute camera pass can turn a mistaken repair into a targeted fix and save you from paying twice.
Why do I need to conduct a camera inspection?
You need a camera inspection to diagnose issues in pipes and drains without costly excavation.
Which is better: DIY or Professional help?
For minor adjustments, it is better to DIY. A professional is the better choice for accurate diagnosis and significant problems.
How often do I need to conduct an inspection?
You must conduct an inspection annually or bilaterally.
How much will it cost to hire a professional service?
A professional service will take around $50 to $150 per hour.