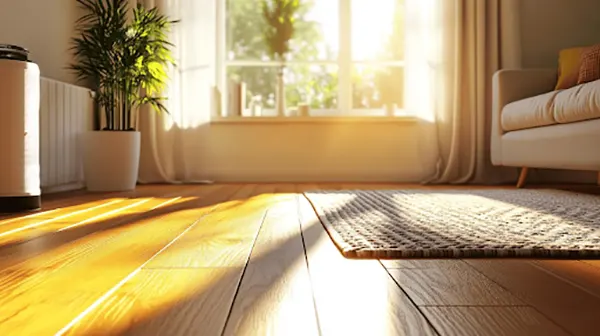
After the exterior, do you know what shines in the house? It’s the hardwood floors, which cover the most area in the house. They are an investment, yet they also encounter the grind of foot traffic, spills, and sunlight.
Slowly, the shine fades away, and damage occurs. This proves the data from the National Wood Flooring Association, as it is stated that properly sealed and maintained hardwood can last for 100 years, while neglected floors require costly reinstallation within 10 to 15 years.
Beyond aesthetics, a good upkeep of your floor is about preservation. Come and explore with me on the journey from finding the right sealant for your floor to total care.
Scroll up to find the solution for your hardwood protection right now!
KEY TAKEAWAYS
- A seal is the most important barrier to keep moisture, abrasion, and staining away from the wood fiber.
- When a wood floor is sealed correctly, it adds years to the life of the floor and significantly reduces the need for refinishing for decades.
- The proper sealing will enhance the floor’s natural beauty and provide ease of routine cleaning and maintenance.
Why Sealing Matters: Beyond The Surface
The surface of wood may get damaged easily, but using a sealant, especially on flooring, provides proactive benefits that help ensure the longitudes of flooring.
- Wood is porous and can absorb any moisture without a proper seal.
- Once it absorbs, it can warp, stain, and grow mildew.
Along with protecting from outside elements, a seal also locks the wood’s internal beauty.
Different Types Of Sealants & Their Uses
Before applying any layer on the surface, it is vital to explore all the different types of seals that are available. Each type of seal has its advantages with respect to durability, finishing, and drying time.
1. Water-Based Polyurethane
- Low odor and quick drying time
- Durable finish and clear
- VOCs are one of the types that are less harmful.
2. Oil-Based Polyurethane
- Superior durability and rich amber hue.
- Significantly takes significantly longer to cure and produces strong fumes.
- Hard and scratch-resistant; ideal for high-traffic areas.
3. Penetrating / Natural Oils & Hardwax Oils
- Nourishes and protects the woods from the inside.
- Easy to spot, repair, and maintain.
- Leaves are natural matte look; showing an authentic, tactile surface.
4. Specialty Formulas (Moisture-Cured, Aluminum Oxide, Etc.)
- Fulfills requirements in commercial spaces or very active homes.
- Requires extensive professional care.
- A layer of Aluminum oxide provides maximum abrasion resistance.
Preparing For The Seal: Surface Work You Can’t Skip
For me, preparing for this sealant is the most critical stage. The final finish depends on the initial preparation.
- Sanding & Leveling
- A process that smooths out the surface: opens up the grain of wood. One must ensure all odd finishes, scratches, and stains have been completely removed. This process offers the best possibility for proper adhesion of the final coat of sealant.
- Filling Gaps & Cracks
- Before covering, addressing gates and cracks is important to prevent moisture attack. Choose a filler that closely matches the wood type, improving overall aesthetics.
- Thorough Cleaning & Dust Removal
- The floor should be thoroughly cleaned using a vacuum or a damp cloth. As the tiny dust left on the floor can cause permanent damage.
- Ensure Proper Climate Conditions
Always take note of the climatic conditions, and maintain a moderate temperature. This prevents ruining the final appearance and durability.
Application Guide: Coats, Technique & Curing
Patience and precision are two keys essential for a worthwhile investment. Here is an overview of what you might be seeking.
How Many Coats?
For every home, 3 to 4 coats of polyurethane are enough. First layer: seal, second coat: bonding to wood, overcoats: protective layer.
Application Technique
Looking for a sleek finish? Just consider a consistent, even technique while moving in the direction of the wood grain.
Curing & Drying Time
Walking areas need 24 hours to dry out fully. Right after that, avoid placing heavy furniture and rugs.
Post-Installation: Care & Maintenance Tips
Some of the post-installation care tips I learnt from my grandfather, fortunately, worked efficiently. I’m sharing them here:
- The length of time a seal will last is directly proportional to the regular care of the surface.
- Schedule a professional service, if possible, for surface cleaning.
- Always avoid using harmful chemical content products, specifically for sealed hardwood floors.
- Use protective felt pads under furniture and consider a no-shoe policy to protect from abrasive dirt.
When To Refinish: Recognizing The Limits
The biggest benefit of determining when it is necessary to refinish is the potential to eliminate catastrophic damage to the bare wood. Check for deep scratches, exposed areas of wood, or if the floor remains dull after repeated cleaning, the finish has failed.
Therefore, it will be necessary to sand and replace any severely damaged areas of the floor at a higher cost. If the refinishing process took place well before the visibility of the aforementioned issues.
Choosing A Professional For Installation & Refinish
For complex sealants, or when a complete sand and refinish is required. Hiring a National Wood Flooring Association-certified professional service is advisable. It ensures guaranteed knowledge of wood species, moisture levels, and proper product compatibility. The utilization of the appropriate specialized equipment will help to protect the value of your investment.
Investing in hardwood protection is a significant way to conserve your investment for generations to come. A high-quality sealant that has good longevity will maintain the legacy of that flooring.
Every homeowner should strongly consider the steps outlined here. Preserve the investment in beautiful hardwood flooring, and ensure a continued source of comfort, value, and peace of mind.
FAQ
Am I able to steam my sealed hardwood with a steam mop?
No. Steam mops introduce moisture and heat into the wood finish and seams, which causes the finish to peel and warp.
When do I need to re-coat my polyurethane finish?
A properly cared-for polyurethane finish can last for 10 to 15 years before needing a simple screening and recoating.
What is off-gassing?
Off-gassing refers to emissions of volatile organic compounds VOCs from the wood finish into the air during the time it is curing; this is why it is vital to have good ventilation.
Will applying a sealant change my wood’s color?
Oil-based sealants create an amber coloration, while water-based sealants and penetrating oils maintain a more true representation of the wood’s original color