“A poorly installed air conditioner can silently elevate your electricity bill by 20% and shorten its lifespan by ‘years’ – all while leaving your room uncomfortably damp”.
Installing it well is a bit like planting a tree – the right strategy, preparation and care at the beginning determine years of comfort.
As NIST says, “a faulty installation can increase the energy use (or loss of efficiency) by 30%”.
A well installed AC cools efficiently, saves electricity and lasts longer, while a poorly installed AC often leads to leaks, higher bills and frequent repairs.
This guide will walk you through choosing the right unit, preparing your home, choosing the best repairs, such as a Houston ac company and installing it safely – all with practical tips to goodbye stress and save extra costs.
Choosing the Right AC Type for Your Home (Split, Window, Portable, Inverter)
Think of the types of ACs as shoes – the right pair gives comfort, the wrong one causes problems:
Split ACs – versatile, quiet and suitable for most rooms.
Window ACs – easy to install and cost effective for small rooms.
Portable ACs – movable, good for temporary use, but not very effective.
Inverter ACs – adjust power as required with thermostat programming, save 20-40% of energy.
Align your choice with your room size, insulation, sun exposure, insulation and budget.
Calculating BTU: Tonnage Requirements
Before the installation, understand BTU – it’s like a ‘horsepower’ in a car, determining how powerful your cooling system is. Ending on the wrong BTU is one of the most common causes of high bills and poor cooling.
Here is a general tonnage guide:
120 sq ft = 1 ton
150-180 sq ft = 1.5 ton
220-260 sq ft = 2 ton
Make adjustments if your home gets direct sunlight and accommodates many people.
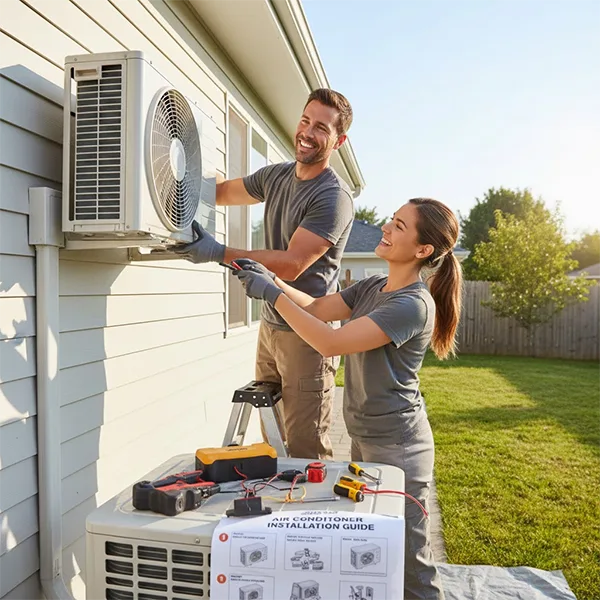
Preparing Your Installation Space Safely
Prepare your installation space, just like the way you spot a good parking space for your car – stable and with the right environment to perform well. Unstable locations can cut down its efficiency:
Indoor Unit:
Keep 7-8 feet in height for proper airflow.
Maintain 6 inch space from the top and sides.
Ensure the wall can easily handle the weight.
Outdoor Unit:
Place in a shaded, well ventilated spot.
Keep atleast 14 inches of clearance from all sides.
Use vibration pads to reduce noise.
Providing the required space to the AC prevents overheating and enhances cooling efficiency.
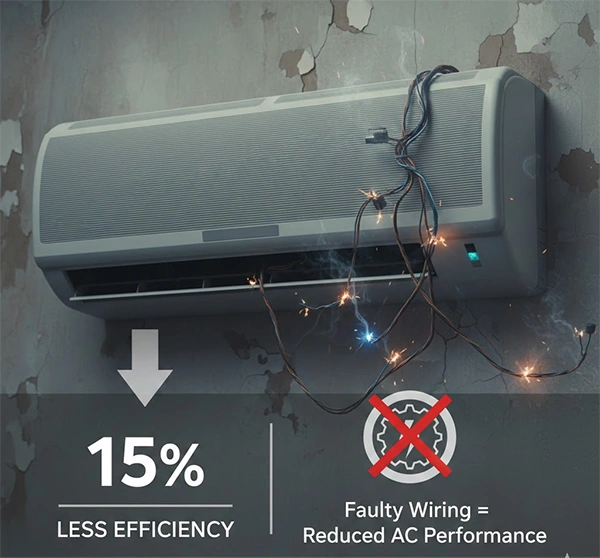
Electrical Load, Wiring, and Breaker Considerations
A proper electrical foundation projects your home – increases AC’s lifespan and avoids random shutdowns.
Proper installation prevents leaks and ensures efficient cooling.
Ensuring Proper Drainage and Airflow
As oxygen is essential for the lungs, the same way airflow is important for AC. A blocked condenser or clogged filters forces the AC to overwork – increasing electricity bills and shortening the AC’s lifespan.
Ensure no furniture obstruction and ensure your outdoor unit isn’t boxed into balconies. Regular cleaning of the filters maintains a steady airflow and reduces energy consumption.
Post-installation Testing and Performance Checks
While testing installation, you might hear strange sounds – similar to when we hear when starting a new car. This ensures everything is working fine and catches issues early if they persist.
Vacuum pump test to remove moisture
Cooling drop test (5–7 minutes)
Noise & vibration
Drainage and refrigerant leak check
Remote, modes, and thermostat functionality review
Skipping these tests often leads to early breakdowns and loss of cooling efficiency.
Common Homeowner Mistakes to Avoid
Even the best AC can fail if the mentioned mistakes are not avoided. Skipping them results in a rise of issues months later, when repairs become expensive.
Choosing the wrong AC capacity.
Placing outdoor units in sunlight or blocked areas.
Using a long pipe for AC.
No dedicated electrical circuit.
Ignoring annual servicing and filter cleaning
Conclusion
Proper AC installation is more than just hanging a unit on the wall – it’s a process with the right strategy, planning, precision and smart placement. By choosing the right AC type, ensuring the right installation space, ensuring proper wiring and following standard security checks – you will ensure you enjoy superior cooling with a lower bill and long lasting comfort.
Frequently Asked Questions
Is it possible that I install my split AC myself?
Technically, yes, but practically, there should be a professional taking care of this.
How often should I service the AC?
At least once a year – for clean filters, efficient cooling, and detecting if any issues are there.
How can I know if my AC is improperly sized?
If the room is cooling unevenly and the cooling cycles are switching on/off frequently – it shows that your AC is improperly sized.