Have you ever wondered how to perform a proper roof checkup to save yourself from last-minute leaking blunders? If yes, we’ve got this covered!
The key to performing a proper roof checkup is to inspect for leaks, water stains, and other similar symptoms. If you spot these signs in the early stages, it will help you out in fixing them without any potential damage.
So, scroll through this till the end and get your hands on the deeper details of such warning signs, and how to potentially fix the issue and maintain a long-lasting roof.
Look for Leaks and Water Stains
First and foremost, if you’re wondering how to find roof leaks, start with the corners of your home. These issues usually occur excessively during the monsoon, and if neglected, they can cause major problems like roof penetrations, downspouts, and more.
Where else can one look?
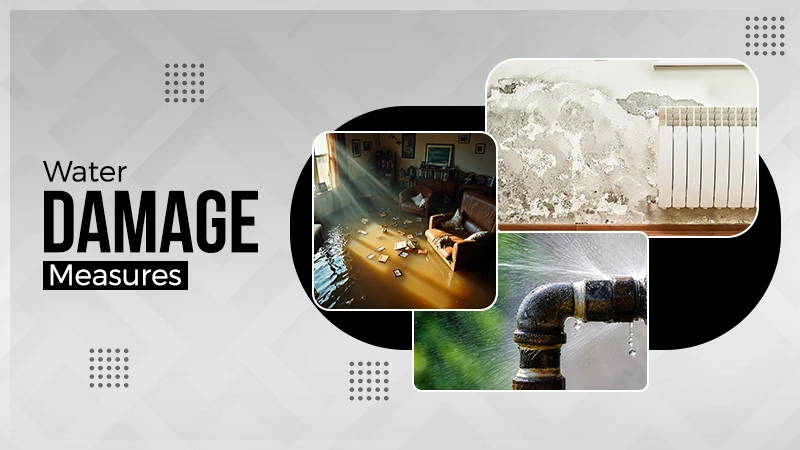
- Ceilings and Walls: Look for stains around the ceiling and corners. It may appear as yellow or brownish patches, or in areas where the paint is peeling.
- Inspect Attic: Consider inspecting the attic for any signs of water damage. Try using a flashlight during the inspection.
- Musty Odors: If you come across slight musty odors, that means for sure there is some hidden water damage in the home.
What to do if you spot it?
Immediately turn off the water supply and prevent it from any potential damage. Next step, identify the source and get some plumbing fixtures done.
Inspect Gutters and Downspouts
Inspecting gutters and downspouts is another crucial element for a proper roof checkup, so start by thoroughly checking for blockages, minor damages and more.
Where else can one look?
- Walking around the house: Start by walking around the house, and look for signs of damage such as small cracks, holes, or more.
- Overflowing water: If you see water staining from the gutters, it surely indicates hidden blockages and improper slopes.
- Cross-check downspouts: Make sure the downspout is free of debris (scattered pieces of something). Because it can become a hurdle in water flowing flawlessly from the bottom.
How to fix this?
Firstly, get the required plumbing fixtures done, and after that, regularly clean and maintain the gutters and downspouts to prevent water damage to your roof.
Evaluate the Attic and Interior Spaces
After evaluating the exterior spaces, look closely at the interior attic and spaces to identify the potential issues. Start by assessing the exterior roof inspection, followed by an interior attic evaluation.
For external roof inspection:
- Look for shingles: Shingles are generally referred to as the overlapping pieces used to cover a roof. Look for signs of damage there, like loose, cracked, dented or bruised shingles.
- Inspect Flashings: Flashing refers to the thin material used to prevent water from entering a building at vulnerable areas. So, inspect flashing around vents, corners, and other areas to make sure the sealing is intact.
For interior attic inspection:
- Ventilation: Check for blockages near the vents, as they can be a hindrance to the airflow and water flow. Also, ensure the exhaust fans installed in the home are towards the exterior, and not towards the attic.
- Insulation Coverage: Ensure that the insulation covers the entire attic floor, avoiding gaps and compression in between.
How to fix this?
Try patching the roof from the outside temporarily and drying out the affected areas. In addition, consider improving the ventilation area and addressing the hidden peripheral issues.
Examine Flashing and Roof Penetrations
Another crucial aspect for a proper roof checkup is evaluating the integrity of flashing around chimneys, vents, and other areas. Look for some signs of rust, cracks, gaps, and more to find out.
Where else can one look?
- Around Roof Structure: Inspect flashings and the roof framing for any signs of potential damage or rot, insect damage, and other structural issues. As these can impact the water flow and cause a hindrance.
- Near Edges and Ridges: People often overlook the edges and the connected areas, but make sure to evaluate those closely. These spaces are extremely prone to water leaking.
How to fix this?
To fix the flashing and roof penetrations, identify the problematic areas, remove damaged flashing, and install a new one, ensuring a tight and properly packed seal.
Assess Age, Wear, and Overall Condition
Lastly, a detailed roof checkup involves assessing every minor to major detail, such as the roof’s age, wear, and overall condition, damages, leaks, external, internal factors, and more.
For assessing the age:
To asses the overall age of the roof, you can make an estimate based on the material used, or you can try looking for any records that features the roof’s installation date.
For assessing the overall condition:
Evaluating the overall condition requires deciphering the extent of damage done, if it’s minor damage – get it fixed, if it’s major damage – consider getting it changed from scratch.
How to fix the overall condition?
If you’re facing issues and damages now and then, consider getting a professional deep evaluation done and get it checked in one go.
Wrapping Up!
A routine roof checkup can prevent many potential damages and fix the underlying issues.
So, homeowners who keep a keen eye on their home during the initial damage can protect both their roof and be easy on their pocket as well. A strong and well-maintained roof starts with attention to detail and regular little check-ins.
How to perform an attic inspection?
Inspect the attic for signs of water leaks, stains, or daylight shining through, indicating potential roof damage.
What to look for during ground inspection?
Walk around and look for missing, damaged, or vented shingles.
Are roof damages covered under insurance?
For this, you need to check your homeowner’s insurance policy and see if the roof damages are covered or not.