In bathrooms and kitchens, the area beneath regular or custom kitchen cabinets is often overlooked or missed while cleaning because it’s hard to reach and difficult to see.
Cabinet toe-kicks, lower edges, and the flooring beneath them are some small details that can affect how clean a room looks. The Mums Cleaning Services Chicago lists a cleaning checklist that includes cabinet surfaces, baseboards, and floors that are closely related to maintaining these overlooked areas.
Stubborn grease, dried spills, and dirt trapped around cabinet edges do not go with a quick wipe. They require a more deliberate approach. Professional cleaning services help with routine kitchen and bathroom cleaning, but it is advised to discuss inaccessible cabinet recesses beforehand.
Understand how the dirt develops and know how to choose suitable tools and avoid damaging the cabinetry.
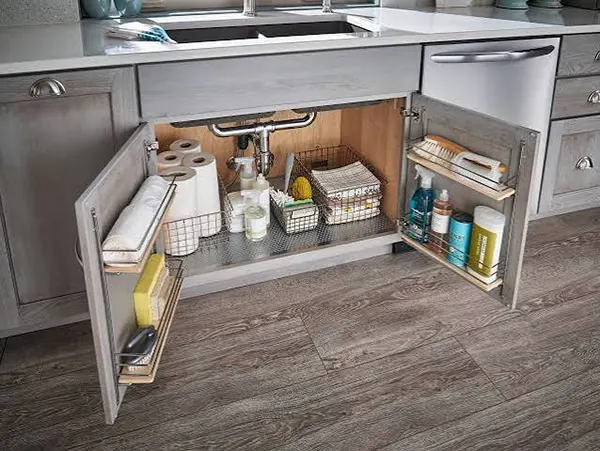
Why Dirt Builds Up Beneath Cabinets
The recessed strip along the bottom of many shaker cabinets is known as a toe-kick. It creates room for your feet when you’re standing at the counter, but it also forms a sheltered area where dirt can accumulate without getting noticed.
In kitchens, crumbs often fall during food preparation and travel toward the lower cabinet edges. Sweeping may move some of them into corners rather than collecting them. Small food particles can also become lodged where the flooring meets the toe-kick, specifically if the joint is slightly uneven.
Grease adds another layer to the issue. Cooking releases tiny droplets that settle on nearby surfaces. Over time, grease can mix with dust and form a sticky film on cabinet edges. A dry cloth may remove the loose dust while revealing the greasy coating behind.
Bathrooms develop a variety of residue. Loose hair, lint from towels, product splashes, and ordinary dust collect along the floor. Moisture can make these particles cling to lower cabinet surfaces, especially near sinks.
The dirt may become more noticeable when light hits the area from the side. A dark line along an otherwise clean cabinet base frequently indicates accumulated grime instead of a problem with the cabinet finish. However, swelling, peeling, or staining that remains after gentle cleaning can point to moisture damage.
Start With the Floor and Loose Debris
Cleaning the cabinet base before removing nearby floor debris generally creates extra work. As soon as you touch the lower edge with a damp fabric, crumbs and dust may stick to the surface or spread across the floor.
Start by clearing small items from the immediate area. Move wastebaskets, bathroom scales, and lightweight objects that block access. Avoid shifting large cabinets, fitted appliances, or plumbing connections just to reach a narrow space.
Use a vacuum with a crevice attachment to clean loose debris along the cabinet base. Work gently around the corners and where the flooring meets the toe-kick. A soft brush attachment can help lift dust from grooves or decorative edges without scratching the finish.
If a vacuum cannot reach the recess comfortably, a soft microfiber cloth wrapped around a suitable narrow cleaning tool may help. Avoid metal scrapers or overly sharp objects that could scratch the cabinet or catch on flooring joints.
Whether the work is happening at home or by cleaning services chicago, this early stage involves the same tasks: cleaning the floors around cabinets, collecting crumbs under accessible edges, and wiping the adjacent surfaces to remove the debris that ordinary mopping sometimes misses. Focused cleaning of hard-to-reach recesses may need to be identified as a separate priority.
Once the loose debris is gone, inspect the lower cabinet surface. You’ll be able to see which marks are caused by dried spills, greasy residue, or changes to the finish itself.
Choose the Right Method for the Cabinet Material
Cabinets may have identical appearances while using very different materials. Painted wood, laminate, thermofoil, and veneered panels can all respond variably to moisture and cleaning products.
A cleaner that cleans grease from a durable laminate surface may leave a mark on delicate paint. Likewise, a technique suitable for sealed wood may scrape an exposed particleboard edge.
Painted Wood and Painted MDF
Painted cabinet bases usually collect scuff marks from shoes, vacuum attachments, and cleaning tools. Their finish can become dull if scrubbed too aggressively.
Start with a clean, soft cloth. If the cabinet manufacturer allows damp cleaning, use a lightly moistened cloth with a suitable mild solution. Wipe a small area gently, then dry it without leaving moisture along the lower corner.
Avoid abrasive pads, concentrated degreasers, and continuous hard rubbing. Matte or satin finishes can develop shiny patches where the coating has been worn or polished by friction.
MDF is especially vulnerable when moisture reaches exposed or damaged edges. If the surface has swollen or the paint is lifting, additional water may make the problem worse.
Laminate and Thermofoil Finishes
Laminate cabinets are usually designed to provide a durable decorative surface, but their seams and edges still need protection. Liquid that penetrates an unsealed joint can affect the lower board.
For compatible finishes, gentle cleaning with a manufacturer-approved cleaner is usually preferable to soaking the surface. Dry the edges afterward, especially where the decorative layer meets a different panel.
Thermofoil cabinets have a vinyl-like coating bonded to a substrate. The coating can become loose or damaged under specific conditions, so strong solvents and excessive heat should be avoided.
If the decorative layer has started separating from the board, wiping will not bond it back into place. A cabinet repair professional should assess the damage.
Natural Wood and Veneered Cabinets
Wooden cabinet bases need specific care near sinks, dishwashers, and bathroom plumbing. Even finished wood can be affected when moisture continuously reaches a vulnerable edge or joint.
Dust first, then use only cleaning products approved for the surface. Do not leave a wet cloth resting against the cabinet while cleaning the floor.
Veneer can be especially delicate because the visible wood layer may be thin. Rough scrubbing or inappropriate solvents can damage its coating and expose the material beneath.
Remove Kitchen Grease Without Spreading It
Kitchen toe-kicks often build up a combination of grease and dust. This residue behaves differently from loose crumbs because it adheres to the surface.
You may see the coating near the stove, beneath food preparation areas, or around cabinet corners where hands and cleaning tools rarely reach. It can feel slightly tacky when touched, even if it is not thick at sight.
First, confirm that the cabinet finish can tolerate the proposed cleaning product. Test it on an inconspicuous section if the manufacturer permits. Put a small amount on the cloth rather than spraying straight onto the cabinet base.
Wipe gently, turning the cloth frequently so the removed grease does not spread over the next section. A second clean cloth may be required to remove residue left by the product. Dry the area once the finish is clean.
Avoid using oven cleaner, strong kitchen degreasers, or harmful sponges on cabinetry unless the manufacturer especially approves them. Products made for heavily soiled cooking equipment may be too harsh for painted or decorative cabinet surfaces.
For households arranging specified kitchen cleaning, Mums Cleaning Services Chicago lists cabinet and drawer exteriors among its deeper cleaning tasks. Greasy lower edges can be mentioned when discussing priorities, although the accessibility and condition of the surfaces should determine what treatment is appropriate.
If the sticky film remains after soft cleaning, resist increasing the pressure immediately. It may be old residue that requires a material-compatible treatment, or the finish itself may have deteriorated.
Deal With Bathroom Moisture Before Cleaning the Cabinet Base
Bathroom cabinets often lie close to sinks and plumbing fixtures. A dark mark near the bottom may be ordinary grime, but it may also indicate that water has been reaching the cabinet continuously.
Look for swelling, peeling laminate, softened board, discoloured seams, or a persistent musty smell. These signs can indicate moisture exposure that requires investigation before cosmetic cleaning.
Check whether water repeatedly drips from the sink area or splashes onto the cabinet front. Inspect visible plumbing beneath the basin for signs of leakage, without dismantling fixtures or disturbing pipelines.
For ordinary hair and dust, start with dry removal. Vacuum the accessible floor edge and wipe suitable surfaces with a soft cloth. Where the finish permits damp cleaning, use as little moisture as essential and dry the area afterward.
Give attention to the joint between the cabinet and flooring. Leaving water pooled along this line can cause issues for some cabinet materials, particularly when the protective coating has worn away.
Bathroom cleaning services may include sinks, floors, accessible cabinet surfaces, and other areas where moisture and residue collect. However, a cabinet showing signs of leakage or water damage requires the cause to be corrected rather than repeated surface cleaning.
If the base is swollen or soft, avoid pressing hard against it. A damp cloth cannot treat damaged board, and further wetting may worsen its condition.
Clean the Floor-to-Cabinet Joint Without Causing Damage
The line where flooring meets the cabinet base can be surprisingly hard to maintain. On tile floors, grout may collect dark residue close to the cabinet. On vinyl or laminate flooring, dirt can lie in small gaps and along trim.
Treat the floor according to its material rather than using the same cleaning solution on both the flooring and cabinetry. A product suitable for ceramic tile may damage nearby painted wood or a decorative cabinet layer.
When mopping, keep the mop controlled rather than pushing large amounts of water into the toe-kick. Wetting the cabinet base continuously is unnecessary and can be harmful if the lower edge is not properly sealed.
For a narrow joint, a soft cloth or suitable brush can remove stubborn surface dirt. Do not dig into caulked seams or grout with sharp tools. Caulk is required to remain in place, and damaging it can create new openings for moisture.
If the joint contains cracked sealant, missing grout, or gaps where water enters, wiping alone will not correct the problem. Repairing the affected material may be necessary.
Regular floor care provided by Mums Cleaning Services Chicago can complement cabinet maintenance by reducing debris along these edges. When the area contains delicate finishes, damaged joints, or restricted access, those conditions are worth verifying before work begins.
A clean floor-to-cabinet joint should not need aggressive scraping. The goal is to remove accumulated residue without disturbing the materials that protect the cabinet and flooring.
Know When Dirt Is Actually Cabinet Damage
Some marks along cabinet bases stay after careful cleaning because they are not dirt.
Scuffs may have removed paint, exposing a darker layer underneath. Water damage can create raised or swollen edges. In kitchens, continuous impacts from vacuum cleaners or shoes can gradually chip the finish along the toe-kick.
The difference matters because stronger cleaning products will not treat physical damage. They may make the exposed material more vulnerable to moisture.
A useful first check is to clean a small, intact section nearby. If usual residue comes away but the damaged-looking area remains unchanged, inspect the texture and edges instead of continuing to scrub.
Peeling laminate, bubbling paint, and softened boards generally point toward a repair issue. Persistent dampness should also be investigated, particularly near dishwashers, sinks, toilets, and various plumbing fixtures.
For extensive staining or visible fungal growth associated with a moisture issue, address the source and seek appropriate professional assessment. Covering the area with fragrance or continuously applying household cleaner does not solve the underlying condition.
Cabinet repair, plumbing work, and moisture remediation should not be confused with general housekeeping. Recognising that distinction helps protect the surrounding surfaces from unnecessary treatment.
Keep Cabinet Bases Cleaner Between Thorough Sessions
Once the lower cabinet edges are clean, maintaining them becomes much more convenient. The main goal is to prevent loose debris from remaining long enough to mix with grease or moisture.
In the kitchen, collect visible crumbs around cabinet bases when cleaning the floor. Wipe fresh food splashes before they dry into a sticky coating. Periodically inspect the lower edge near the stove, dishwasher, and sink, where residue can easily accumulate.
In bathrooms, remove hair and dust from the floor before damp cleaning. Dry any water that splashes onto lower cabinet panels, and give attention to recurring marks that could suggest a leak.
Using suitable attachments on a vacuum can decrease the need for scrubbing. A soft crevice tool reaches narrow corners more easily than a large mop head and is less likely to push dirty water against the cabinet structure.
Households using recurring cleaning services can identify toe-kicks and lower cabinet corners as areas worth periodic attention. The frequency depends on how much cooking takes place, how often the bathrooms are used, and whether spills or moisture often reach those surfaces.
Not every cabinet needs the same level of cleaning. A dry storage cabinet may collect only light dust, while one near a busy sink may require more frequent inspection. Responding to the actual condition of the surface is more practical than applying a rigid schedule to every room.
Maintain Clean Cabinet Edges Without Harming the Finish
The gaps beneath kitchen and bathroom cabinets collect dirt because they’re sheltered, narrow, and easy to miss. Crumbs, dust, grease, hair, and moisture can gradually create dark lines along the lower edges, even when the rest of the room looks clean.
Careful cleaning starts with removing loose debris, verifying the cabinet material, and using only the moisture and products that the finish can tolerate. If the edge is swollen, peeling, or persistently damp, the priority shifts from removing dirt to investigating possible damage.
The cleaning checklist published by Mums Cleaning Services Chicago involves relevant household tasks such as cabinet wiping, floor cleaning, and baseboard care. When unusually dirty toe-kicks or fragile finishes need attention, clarifying the exact scope beforehand is more useful than assuming every recessed area receives the same treatment.
Whether managed as part of routine household upkeep or through professional cleaning services, these small spaces benefit from careful methods rather than aggressive scrubbing. Removing crumbs early, controlling moisture, and looking for damaged edges can keep the cabinets looking better while preserving the materials beneath their finish.
FAQs
How to clean beneath bathroom and kitchen cabinets?
Start by removing loose debris with a vacuum cleaner. Then use a soft cloth and a suitable cleaner for the cabinet material, applying the minimal moisture and drying the area thoroughly.
How to remove grease from cabinet toe kicks without damaging the finish?
Use a manufacturer-approved cleaner and wipe gently with a soft cloth. Avoid abrasive pads and aggressive scrubbing that can damage the finish.
How can you tell whether cabinet-base stains are dirt or water damage?
Swelling, peeling, bubbling, softened boards, and persistent musty smells indicate moisture damage. That can be treated by fixing leaks and doing repairs rather than wiping.