Learning to cover a raised garden bed is super important, as it can make or break your months of hard work. When it is too cold and frosty, and you don’t cover your plants, winter is going to wipe everything out! Or, if it is scorching outside and you don’t know anything about the shade sheet, the sun will drain your garden.
Raised garden bed covers help prevent damage from pests, rodents, other animals, and harsh weather. So, if you need help with essential plant covers, this guide walks you through everything you need to know.
Quick Answer:
How to Cover a Raised Garden Bed?
- Remove all the dead parts of the plants from the bed.
- Loosen the soil and add compost.
- Water for moisture. Be mindful on winter days.
- Add mulch for insulation.
- Choose an appropriate cover, i.e., the frost cloth, shade sheet, pest net, etc., and install it.
- Check the proper functioning of the drainage.
Why Should You Cover a Raised Garden Bed?
There are several reasons why you must cover a raised garden bed. In short, these are as follows.
- Protection from frost
- Protection from bad weather
- Control over the environment
- Reduction in pest damage
- Enjoyment of a year-round crop
- Money saving
Consider the elaboration on each point below.
- Protection from frost: Frost is the biggest culprit when it comes to massive damage to your producing plants and vegetation. If you don’t want your garden’s hard work to freeze away in the frost, you need to use garden bed covers. So, you can grow all types of best winter garden plants without much headache.
- Protection from bad weather: You don’t want to take any chances. Even a second’s weather wrath can destroy your weeks and months of work! Hail, strong winds, & downpours are examples of such conditions. Covers used here are temporary and will be removed after the situation has improved.
For example, you can cover a newly sprouted plant with a metal bucket upside down in torrential rain. And remove it once the rain is over.
- Control over the environment: When you protect your plants with a variety of covers in different seasons, as per the varying conditions, you get better control over the environment. Like on scorching summer days, you can throw over an appropriate shade sheet. And that will help reduce the intensity of the UV rays. On winter days, the frost cloths help keep the temperature high enough for vegetation growth.
- Reduction in pest damage: Now, with strong covers in between, sneaky pests can never get to your precious produce. And we are not just talking about mini creatures like any type of insect, but rabbits and deer, too.
- Enjoyment of a year-round crop: Options like a cold frame and a mini hoop tunnel can help you extend one season into another. It will stretch your harvest season, allowing more time to enjoy the produce.
- Money saving: People who use covers collect maximum output with zero damage. And that is what you need to get full value for your money.
Best Types of Raised Garden Bed Covers
To cover a raised garden bed, you can use a variety of cover options, such as row covers, polyethylene sheeting, cold frames, minihoop tunnels, shade cloth, netting & mesh, and cloches. I have shared my experience with all of them below.
1. Row Covers

This is the lightest sort of cover that you can put over your raised garden beds. These covers are easy to set up with hoops or stakes. A row cover will help you extend growing seasons with optimal protection from pests.
2. Polyethylene Sheeting
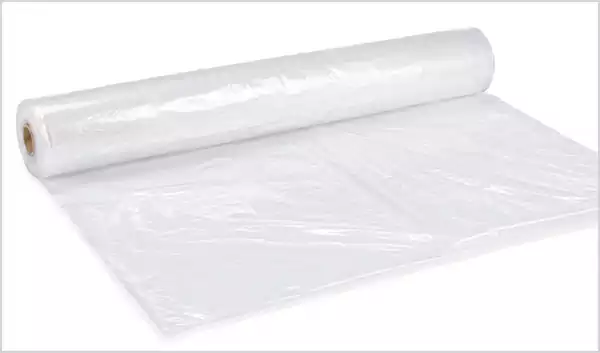
Do you often grow heat-loving crops like tomatoes and peppers? Then, this cover option is for you! I always use them to retain moisture and increase soil temperature. You just have to lay it on the soil! And the most fun is their ability to suppress weeds. So you can have the full growth of plants and vegetables.
3. Cold Frames & Minihoop Tunnels
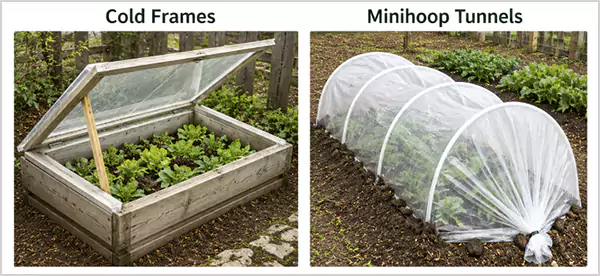
From my experience in raised gardening, if you are a first-time gardener, I would recommend using these tools. These frames and tunnels are also great for you when handling late summer or cool-season cover crops.
4. Shade Cloth
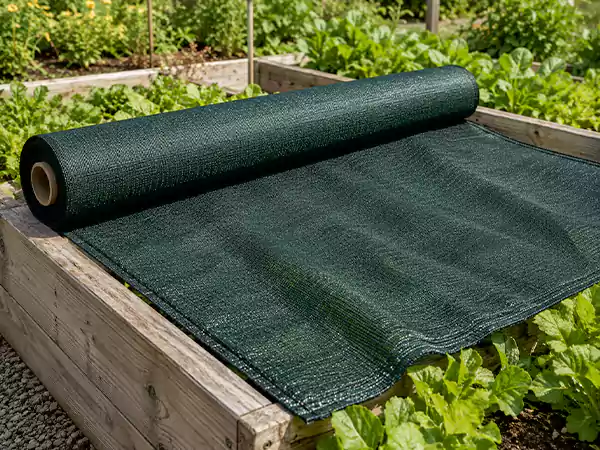
The weather keeps changing. So, your practices to cover for a raised garden bed should adapt as well. Shade clothes help you protect your fragile plants from excess heat and sun exposure. These are perfect to even cover your best shade perennials.
5. Netting and Mesh
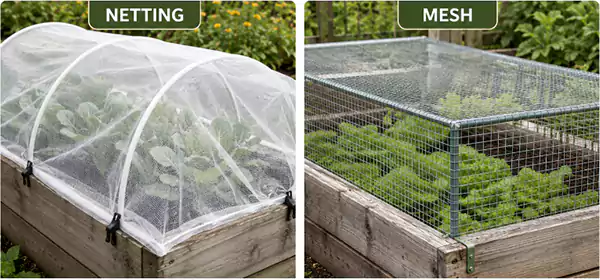
These covers and structures are crucial if you are trying to deal with insects and deer-like big animals. Make sure your nets don’t even have tiny holes. They will be big enough to allow the whole colony of insects and pests in.
6. Cloches
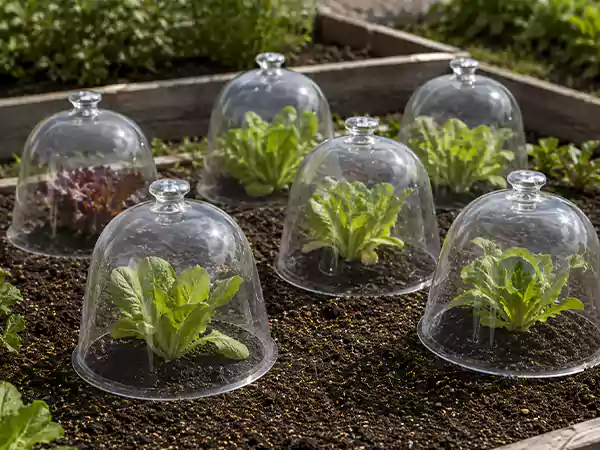
These materials are effective to cover a raised garden bed in spring and fall. Traditionally, these were bell-shaped glass jars and used to protect your plants from cold weather.
How to Cover a Raised Garden Bed for Winter?
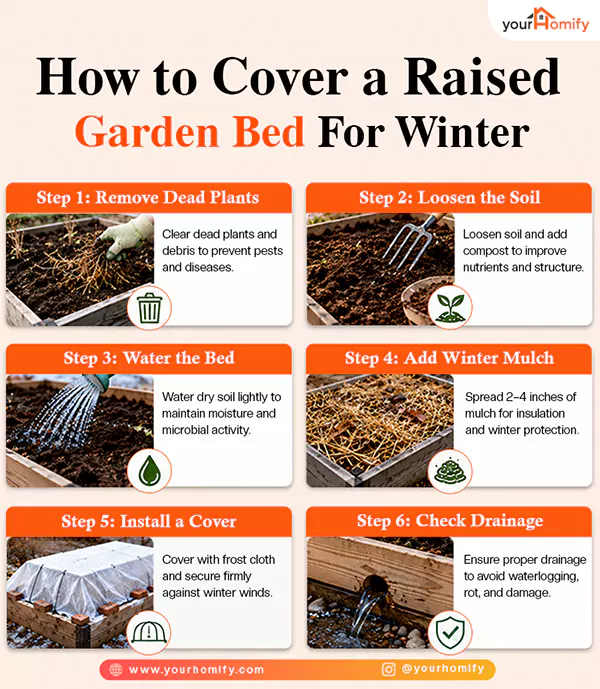
I wish someone had told me this when I first set out to cover a raised garden bed, especially in Winter. So, let me share my experience with you now on how to cover a raised garden bed. It is a simple yet effective process involving 6 steps:
- Remove dead plant parts
- Loosen the soil
- Water for moisture
- Add mulch for insulation
- Install a cover
- Check drainage
Yourhomify Insight: This process teaches you the importance of intensive care before covering your raised garden beds. Good care with the right cover, both are indispensable. And that holds even on winter days.
I have provided an elaborate explanation below.
Step 1: Remove the Dead Plants
Your garden bed must have accumulated a lot of dead plants, roots, and other fallen foliage. Get rid of all these. It will ensure that diseases and pests don’t pass from one generation of plants to another.
Step 2: Loosen the Soil
Now, check the quality of the soil. Loosen its grip and mix compost to enrich its properties. This adds nutrients to the soil on which your plants and vegetables survive. During the winter, this step is especially true as the weather conditions become harsh and suppressive.
Step 3: Water the Bed
Never forget to add enough water if the bed is dry and flaky after you have loosened the soil. It will soften the bed further and help essential nutrients from the compost seep deeply into the soil layers. Plants need a healthy combination of water and compost to grow and produce abundantly. Additionally, moisture helps soil microbes stay active.
Make sure that you only water occasionally if your bed is moist enough during winter days.
Step 4: Add Winter Mulch
Now, use 2 to 4 inches of winter mulch all over the top of the bed. Straw, compost, and shredded leaves are the best options here. A good amount of mulch always helps with better insulation and protection.
Step 5: Initiate the Final Installation
Finally, we have come to the covering part! Use a frost cloth or plastic sheet to cover the top of the bed. Here, you need to secure this cover well so it doesn’t fly away. You can use bricks or landscape pins for this purpose. Or, buy a suitable structure first for your plant beds, over which you can then spread the cover in winter. Here, you can also do something DIY. It is very easy to find the best online suppliers for DIY projects in seconds!
Don’t wait for winter to come and then prepare! Check the conditions and make all the purchases in advance for your raised garden bed cover. So, when the winter season comes, you can focus on the covering part only. Otherwise, sourcing the right materials from various vendors will become a real hassle at the last moment.
Step 6: Check
Drainage has to be properly working! That was my biggest mistake because I was very new to gardening. I didn’t check well on this aspect. And I remember all my first plants and vegetables rotted away while I thought the water would get soaked and vaporized quickly (one of the winter weeks). So, don’t leave until you have ensured proper drainage points in your garden bed holders.
You might say! Well, this is pretty basic. Who doesn’t know about the importance of drainage in potted and confined planting or gardening? That is true, but not everyone is a pro right from the start.
How to Make a DIY Raised Garden Bed Cover for Utmost Protection?
It is very easy to learn how to build a cover for a raised garden bed! You just need genuine insights from someone experienced. I have tried to formulate the following tutorial for you. So, even if you don’t have much time, you get the key idea across almost instantly.
Process at a glance: You just primarily have to stick flexible poly pipes over bamboo stakes in arched forms. And, when these DIY hoops are ready, take a cover and spread it over! You are DONE!
Supplies you need to cover a raised garden bed size of 1.4 w x 2.2 l meters (4.5 x 7 feet) dimensions.
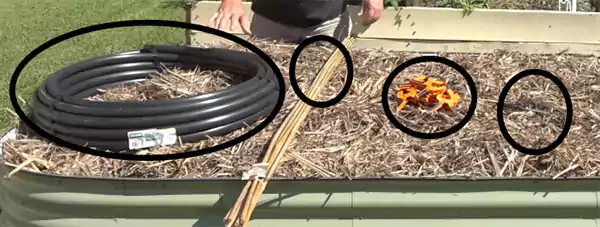
- Poly pipe, which is primarily used for irrigation
- Bamboo stakes, at least 10 of them
- 10 clamps
- A pair of capable scissors
Let’s start with the steps.
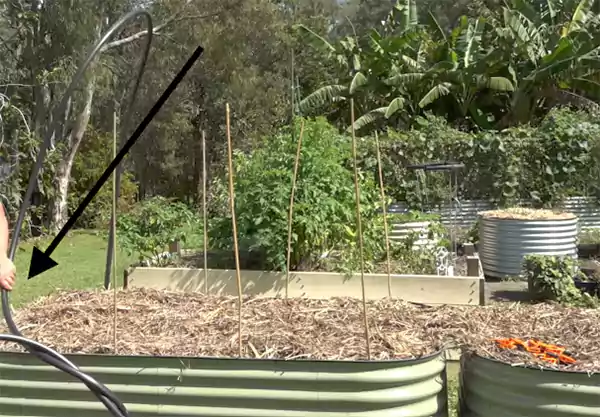
- Take bamboo stakes and thrust them into various corners of your bed. Make sure a few feet are hanging out at each post.
- Get one end of your poly pipe and make each stake go into it until it hits the end.
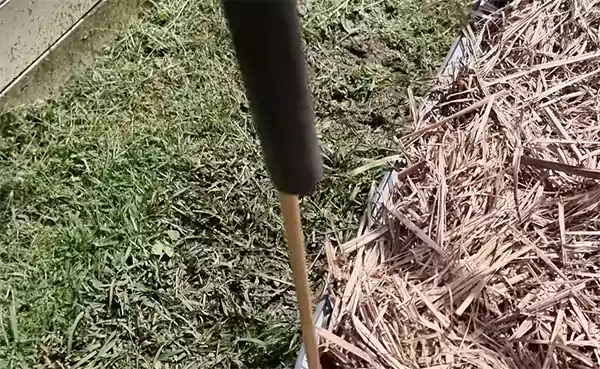
- Do the same with the other end of your poly pipe. But ensure that before making a cut, you measure and mark it accurately.
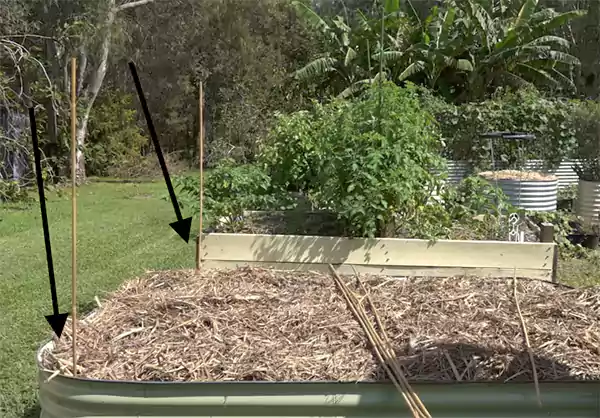
- Follow these steps till all the posts are covered with the poly pipe arches.
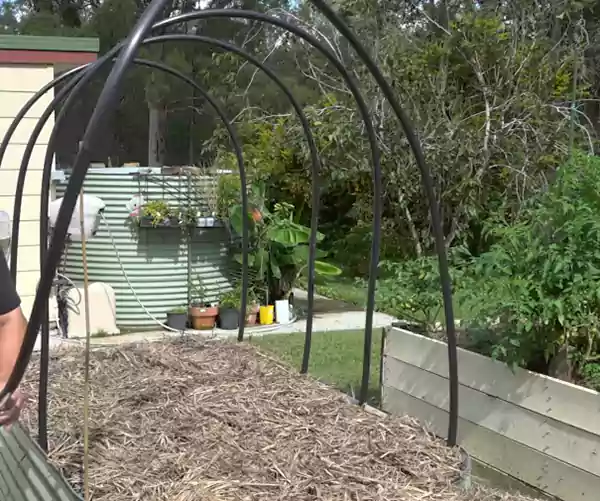
- Once the arch framework is ready, you can take any type of cover and spread it over. For example, look at the bird net used in the image below.
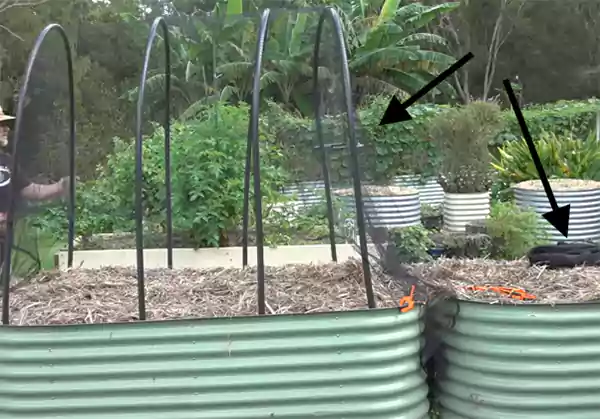
- After the proper spread, grab all the loose corners and grip them together so you can reduce the open gaps in between. Then, finally, take your clamps and shut the lower end of the net closed. Clamping makes your net secure and gap-free. Nothing can enter the bed.
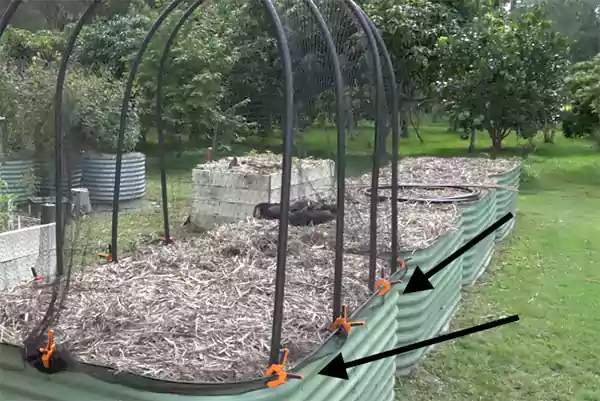
Practical value: It is a versatile framework at an affordable rate. So, not just the bird net, but you can also use an insect mesh, a shade cloth, and even a plastic sheet for temperature control on cold days!
Common Mistakes When Covering Raised Garden Beds
The most common mistakes while covering your raised garden beds are related to improper measurements, too-fragile posts, forgetting to remove temporary covers, and overlooking damage.
- Improper measurements: Before you set out to buy something to cover a raised garden bed, make sure your measurements are right. You don’t want to end up buying a short framework!
- Too fragile posts: If you have planned to create a cover yourself, make sure your stakes aren’t too fragile. That is because they won’t be able to bear the weight of your plastic sheets or frost clothes, giving way.
- Forgetting to remove temporary covers: Sometimes, you just have to cover your plants, vegetables, and saplings for a while, like during rain or other bad conditions. But most people forget to remove it, and the weakly established plant dies in confinement due to suffocation or too much heat.
- Overlooking damage: While using old covers, inspect thoroughly. There must not be any holes or tears in them. Or that cover is going to be of no use!
Conclusion
Whether you buy materials to cover a raised garden bed or make something DIY, always ensure you don’t make common mistakes. These covers are super important if you are a passionate new gardener. You don’t want to witness ruined produce at harvest time just because you didn’t cover it well. And it is not that hard as well if you are willing!
FAQs
Should you cover a raised garden bed?
Yes. It helps protect your plants and vegetables from pests, insects, herbivores, and other factors.
What is the best cover for raised beds?
It depends on the condition. On a cold day, the frost clothes are best. And, on a summer day, you have to use the shade sheet to prevent excessive heat from scorching the fresh leaves.
Should I cover my raised beds with cardboard in winter?
Yes, but for a higher level of efficiency, make sure that you choose a frost cloth.
- Covering Garden Beds – The Red News, United Kingdom
- Should You Cover Raised Garden Beds All Winter? – Yahoo
- Row covers for Frost Protection – Michigan State University News Article