

Monstera plants propagate quickly through stem cuttings very easily. To propagate monstera, three methods are used: soil propagation, water propagation, and air layering. It is considered that spring and summer are the best time to propagate monstera. Proper sunlight and enough water are the main plant care tips for monstera. The main challenges in propagation are stem rotting, incorrect cutting, and bacterial infections.
In this guide, I have elaborated on topics such as the steps of propagation of the plant, how it is helpful, caring tips, challenges, required tools, and lastly, the best time for propagation.
Quick Answer
Monstera can be propagated through soil, water, or air layering. Select a healthy stem with a leaf and a node, then use a sterilized shear to cut about 2 inches below it. For soil propagation, plant the cutting in a chunky aroid mix and keep it moist. For water propagation, place the node in a clean jar of water, changing it every few days until roots reach 2 inches, then transfer to soil. Spring and early summer, with bright indirect light, work best.
What are Different Ways to Propagate Monstera?
There are multiple methods to propagate monstera, like soil propagation, air layering, and water propagation. The first step in each method is finding a good stem; then you have to make a cut with a sharp object and place it in soil or water. While air layering, you make a small cut in the stem and cover it with moss. Let’s read the detailed process for each propagation method.
1. With Soil
To propagate monstera with soil propagation, start by taking a stem, then make a cut 2 inches below the node, snip off the extra leaves, and clean the stem. Then take a pot and fill it with a soil mix. Make some space with a stick or finger in the middle and place the stem in it. Take a look at each step of the process in detail.
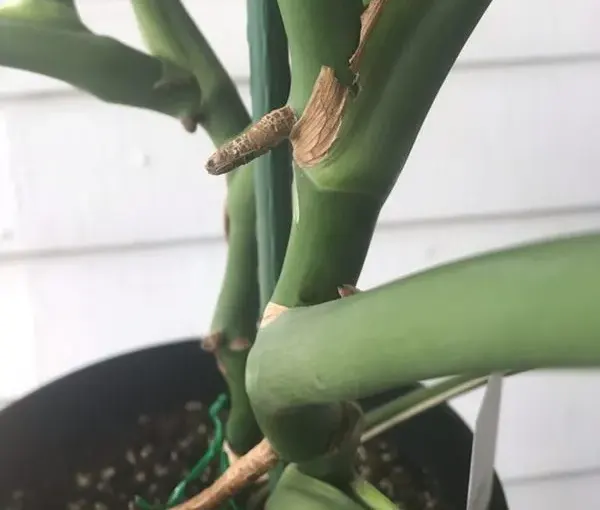
Step1: Firstly, you have to find a perfect stem that has a node (bumpy section on the stem from where the leaves grow) and a leaf. Too many leaves can cause quick dehydration on the plant. The stem should not be longer than 3 to 4 inches in length. Long branches can lead to quick dehydration.
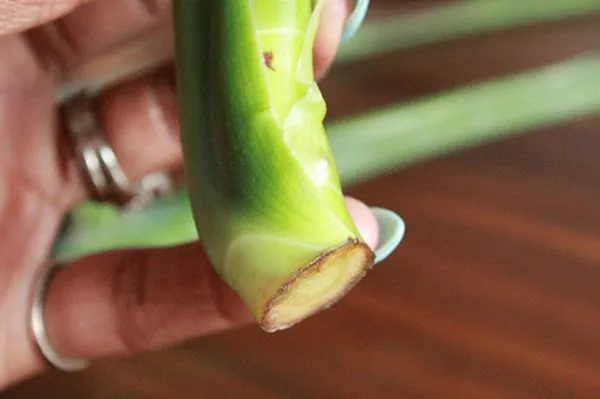
Step2: Take a sharp shear to make a cut. Sterilize it and then make a cut 2 inches below the node. The cut should be straight; after that, clean it properly. The node should be clean; cutting with non-sterilized tools can cause infection and affect the plant’s growth.
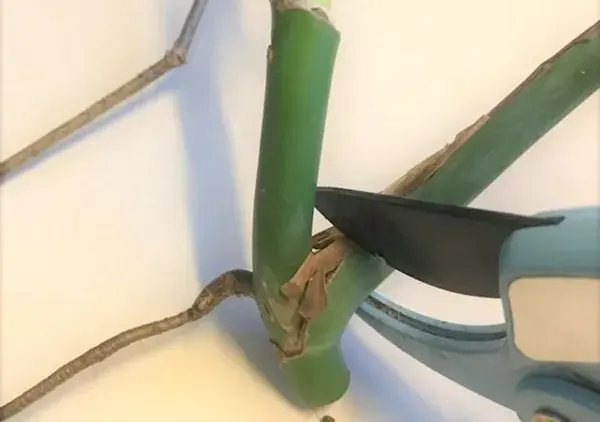
Step 3: For fast and proper growth of the plant, the stem should not be long, and there should not be more than one leaf; if there are leaves, snip them off.
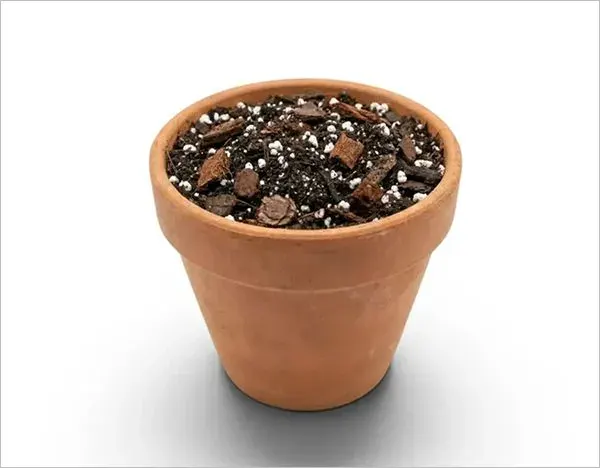
Step 4: Take a pot and ensure there is a proper water drainage holes. Now fill it with soil. Make sure the soil is moist and use chunky aroid mix in the pot. While filling the pot, use light hands. Pressing the soil with harshness can cause no space within to hold oxygen, due to which the roots cannot breathe properly. Pass water through the soil; it must be moist but not dripping wet.
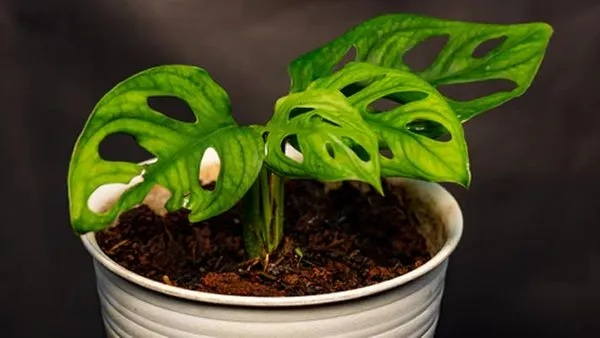
Step 5: After prepping the soil, make space for holding the plant in the middle with the help of a finger or a stick; it should be 1 inch deep. Now, place the cutting inside; make sure that the node is buried fully inside the soil.
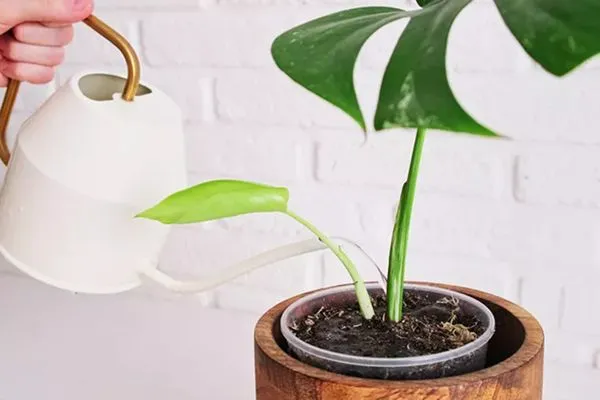
Step 6: After plantation you have to take care of the plant. Keep it in sunlight for 10 hours. Provide water 2 times a week, or when the upper 2-inch layer of the soil gets dry. Make sure there is no blackish or rotting, and if there is any, search for the issue. You will see a new branch in 4-5 weeks, which means the plant is growing properly.
2. Inside Water
In water propagation, you will take a node and place it inside a transparent jar filled with clean water. Then, wait for the next 2 weeks after the roots grow out, and transfer the plant to a pot. Let’s walk through the detailed steps of water propagation together.
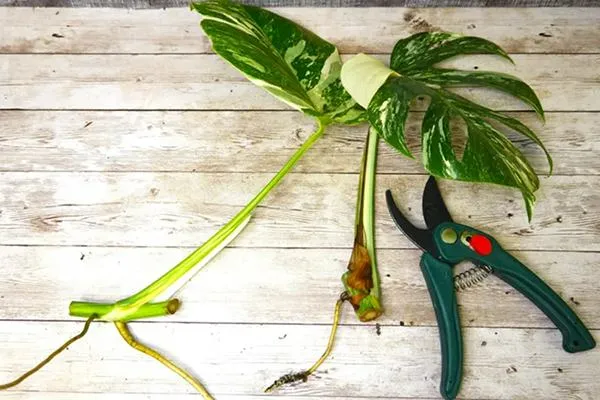
Step 1: Identify the best node and make a cut. The node plays an important role as it will grow into a root. Make sure the mother plant is healthy, and the stem has grown out in the recent few months, so the baby plant can have proper growth. The stem should have a leaf and a node.
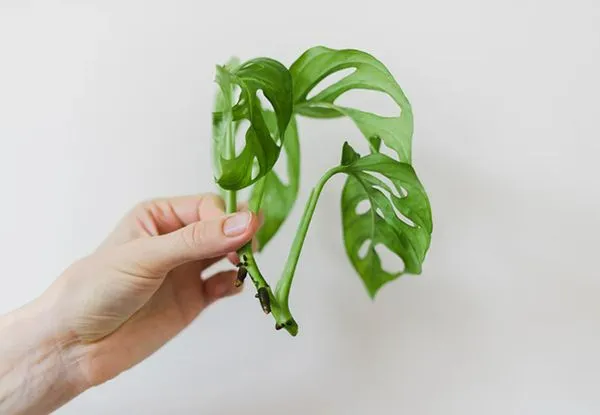
Step 2: Use a sharp shear or knife. Make a cut 2 inches below the node and clean it properly. If there is more than one leaf at the node, snip it slowly. Don’t rub or apply pressure to the node.
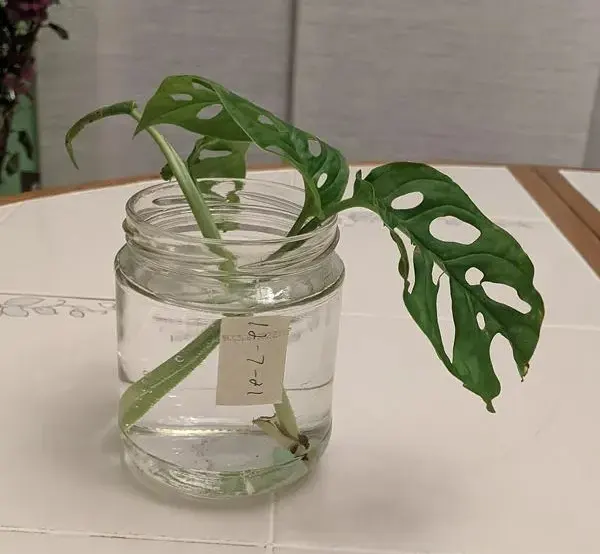
Step 3: Take a transparent jar and fill it with clean water. Make sure no leaves are getting inside the water, as it can rot and affect the plant. Change the water in the jar every 3 to 4 days to ensure there is no fungal or bacterial growth. Change the water whenever you feel it is getting dirty.
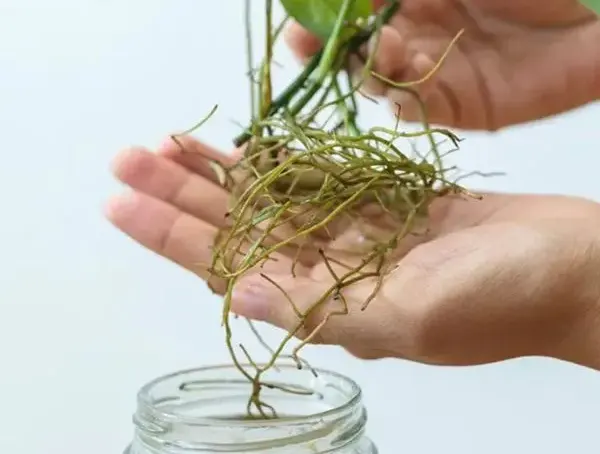
Step 4: Wait for the roots to grow and let it grow for 2 inches till you see the small sproutings in the roots. Then take a pot, fill it with soil, and moist the soil. The pot should have drainage holes, and it should be small in size; large pots stay wet for a longer time, which can cause bacterial growth.
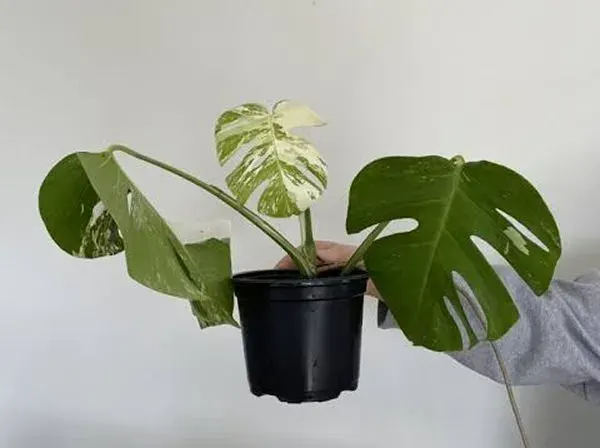
Step 5: With the help of your fingers, make a small hole in the middle of the pot and then place the plant inside it. Make sure the roots are not getting pressed while placing it. After that damp the soil a little and water the plant. Soon it will hold the grip in the soil and start showing growth.
YourHomify Insight
The clear jar helps the plant absorb oxygen through the air and dissolve in water.
Soil roots are typically thicker and fibrous than the water roots, and they absorb water and nutrients from the soil quickly.
Water roots are translucent, and they are thin. These plants have the tendency to absorb oxygen from the air and dissolve it in water.
3. By Air Layering
While propagating through air layering, you have to make a small cut on the stem below the node, just dissecting the stem, not separating it, then cover it with moss and wait till the root grows out. After the root grows, separate it from the plant and put it in the soil. Take a look at the detailed air layering process.
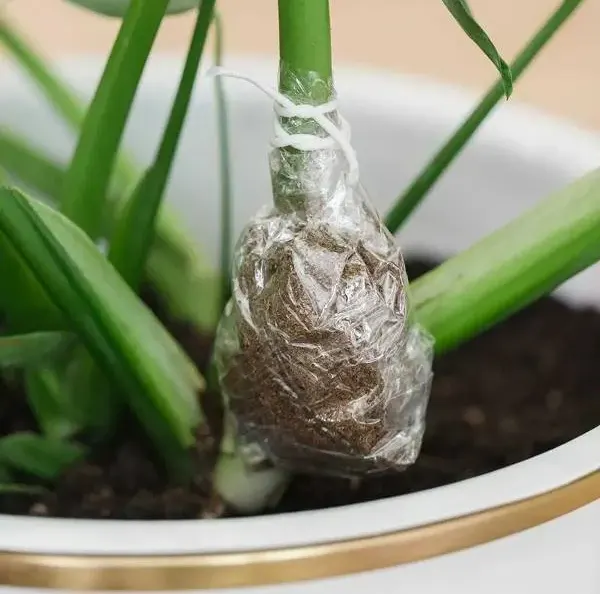
Step 1: Firstly, you need moss and a biodegradable plastic wrap or a rooting ball. These items can be found at the local plant shop or online.
Step 2: Start by making a cut near the node in the mother plant; don’t separate it, just make a small cut on the stem and ensure it is still joined to the plant.
Step 3: Then take the moss and wet it a little, not dripping wet. Cover the stem where you cut it with the moss and then wrap plastic around it. It will keep the moss still and won’t let the moisture out.
Step 4: Keep looking at the moss from time to time; if you feel it is getting dry, spray some water for proper hydration while the root growth.
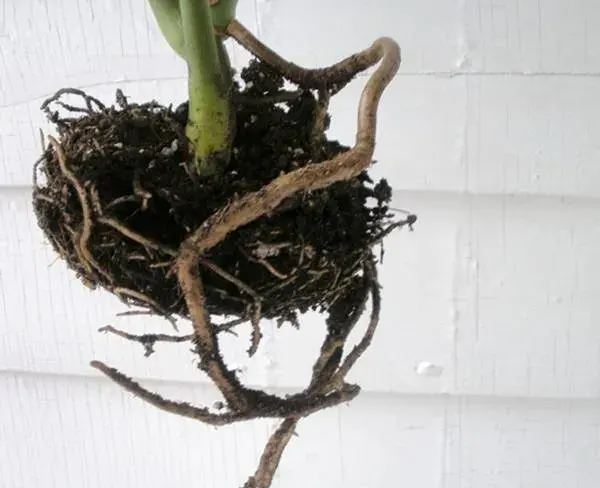
Step 5: After the root reaches a growth of 2 inches, remove the new growth from the stem. Place it in a pot full of soil that has good drainage.
Step 6: Take care of the plant; water it if the soil’s upper 2 inches seem dry, and ensure there is no growth that shows like rotting or infection. Give the plant 10 hours of sunlight.
How is Propagating Monstera Helpful?
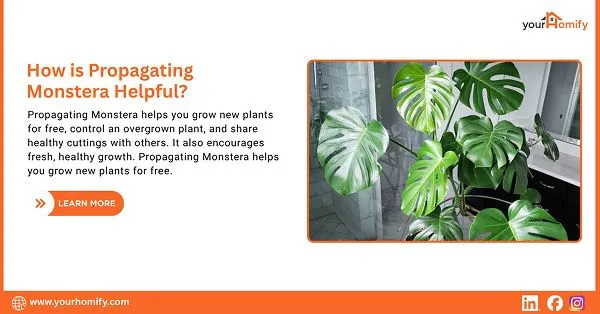
While propagation is the easiest and most effective way to get a new plant, it also affects the plant’s growth positively. Cutting the plants helps the growth of the plants and also increases the plants’ density.
By cutting the plants, you can remove the overgrown stems and the leggy vines. This also helps them give a proper shape. You can also improve the plants’ health by cutting unwanted areas or the areas that have fungal growth on the plant.
When is the Best Time to Propagate Monstera?
The spring and early summer season promotes the growth of this indoor plant. It is the best time to propagate monstera due to the warmer temperatures, long days, and proper humidity in the air.
High temperatures and longer days promote the growth of the plants, and the roots sprout quickly. With proper sunlight, the plant gets complete nutrition, which results in healthy green plants. Moderate humidity in the atmosphere also boosts the growth of the plants. In low humidity, they get dry quickly, and in high humidity, the chances of getting bacterial infections are higher.
What are the Required Resources for Monstera Propagation?
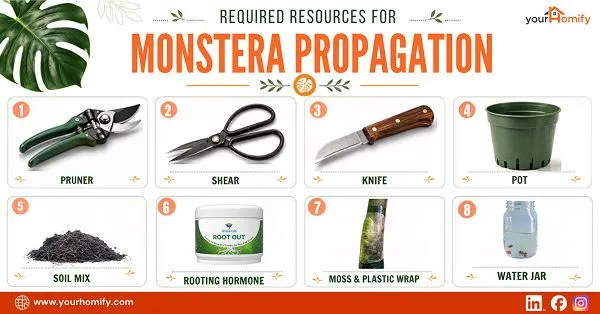
The main tools for planting a Monstera are pruners, shears, and a knife. For water propagation, you need a clear jar; for soil propagation, a pot and soil mix are required. Meanwhile, for air layering, you need moss and wrapping plastic. Some gardeners also use rooting hormones for the quick growth of this tropical plant. Go through the list of items and their uses in detail.
Pruner: With the help of a pruner, you can cut the plant, clean the dead or dry leaves and branches, and cut the stem while propagating. A straight cut can help in proper growth. Make sure you are cleaning and sharpening the tools; using rusted and dirty tools can be infectious for the plant.
Shear: This tool is mainly used for cutting metal sheets, trimming garden hedges, and cutting thick stems or branches for propagation. This tool is used when the stems are strong and fat. Clean it from time to time to ensure there is no rust gathering; it can cause infection.
Knife: A knife is mainly used to cut the plant for air propagation; in this case, you don’t have to separate the stem from the tree; you just have to make a cut between two parts.
Pot: A pot with proper drainage is required for soil propagation and when you transfer the plant to soil after water propagation. The pot must have holes so the water can pass easily.
Soil Mix: You also have to use a good soil mix while propagating or transferring to soil. However, the soil mix usually depends on the plant; for monstera, 70% sustainable block peat and 30% perlite.
Rooting Hormones: If you want to increase the speed of the plant’s growth, then you can use a rooting hormone, which is an artificial, synthetic form of auxin that helps in plant growth.
Moss and Wrapping Plastic: Moss and a clear plastic bag are needed if you are propagating a plant while air layering. The moss will cover the stem, which will help in root growth, whereas the plastic will keep them all in place and block the hydration so the plant can go without hassle.
Water Jar: While propagating, you need to use a clear jar that is transparent. The jar will hold the plant, and proper sunlight will help the plant grow.
Common Issues Faced While Propagation & Their Solutions
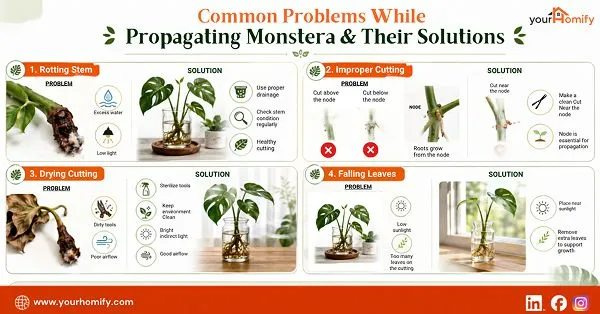
While propagating monstera, rotten stems, loss of leaves, and sudden drying can cause issues. In some cases, improper planting is due to inaccurate cuts. If you are facing any of these common issues, check the details of the issues and the solutions.
1) Rotting Stem: The stems get rotten due to no light or access water you get to see the stems getting mushy and black, and you may also find a foul smell.
Solution: It is important to keep checking, and if the color is changing, know there is fungus and work on it.
2) Improper Cutting: If the cut was incorrect, it is not a big issue; sometimes you may cut a little above or below the new growth, which slows the process down.
Solution: Roots grow out from the node; make your cut near the node. If the stem has no visible node, slip a leaf and dump it inside the soil.
3) Drying: The cut you made has suddenly started dying, or there is a fuzzy wound growing even after proper light and water; then it can be due to pests or disease.
Solution: While cutting the plant, ensure that the tools are clean; clear them with running water. Place it near a window or in a place with good airflow. Dirty air has so many bacteria that affect the plants.
4) Falling leaves: The plant is losing leaves; it can be due to a lack of sunlight, or while propagating the plant, you have cut a long stem.
Solution: Place the plant in good sunlight and remove all the extra leaves that are above it, which can soak away the moisture and also affect the growth of the plant.
Tips to Care for a Monstera After Propagation
For better growth of most plants, these green plants need an accurate amount of water and sunlight. You have to keep checking the plant to ensure there are no fungal infections on it. Also, give it proper support so it can grow fast.
The plants need bright indirect sunlight for 8 to 10 hours a day for proper growth. If you are using water propagation, please choose a transparent container for proper sunlight. For proper growth, plants need almost 60-80% humidity, so in soil propagation, don’t provide too much water; just keep the soil moist. Meanwhile, in water propagation, change the water when it looks dirty.
Saving plants from fungal infections is also important; keep a look at the plants so that no fungus or bacteria are harming them. The stems of this plant climb up. Make sure there is a support that helps it in climbing; it will also fasten the plant’s growth.
Conclusion
In the end, to propagate monstera, there are multiple methods like soil propagation, water propagation, and air layering. If you follow the process provided carefully while keeping the tips in mind, this plant grows very quickly.
The work doesn’t just end on planting; you have to take care of the plant later on, provide proper sunlight and water to the plant, and check for fungal infections. With proper tools and knowledge of the main challenges and best time for planting, you can improve your planting experience.
FAQs
Where do I cut Monstera for propagation?
Make sure that you are making the cut 1 to 2 inches below the node. The stem should not be very long. The scissors or shears must be sharp and clean.
How to propagate Monstera step by step?
Firstly, cut a stem of monstera 2 inches above the node, clean it, and cut all unnecessary leaves. Then place it in soil, water, or do air layering. Position it vertically, and soon you will get the result.
Is it better to propagate Monstera in water or soil?
There is no better way of propagation; both soil and water support the growth equally. You can also prefer the air layering method. Both processes usually take 3 to 4 weeks to propagate.
What are common mistakes in Monstera propagation?
Providing excess water or excess light can be a major mistake. Using a pot with no proper drainage or the wrong pot mix can also affect the growth.
What is the best time to propagate Monstera?
The best time to propagate monstera is from early spring to mid-summer. During this season, there is proper sunlight that helps the growth and 60-80% humidity that supports quick growth.