


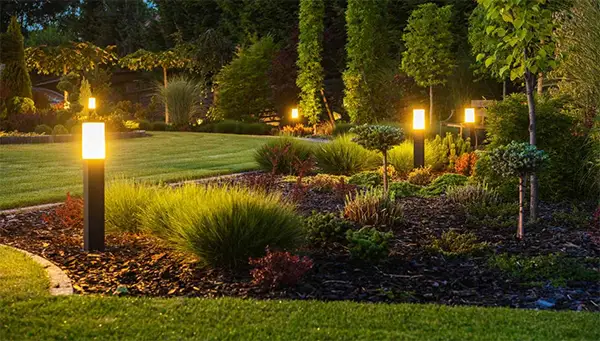
Low-voltage garden lighting is the main feature by which walkway lighting in the backyard is made safer. It provides a low-level glow at the ground to make steps, edges, and changes in grade visible, without causing any discomfort or blinding.
Additionally, these systems operate on 12 volts instead of the usual high voltage current, allowing them to be safely installed yourself, making it an inexpensive arrangement. But the success depends on spacing the light fixtures correctly and selecting the style that suits the job.
Let’s take a look at what fixtures to choose according to your requirements and what the total costs would come out to be.
How Low-Voltage Pathway Lighting Actually Works
A low-voltage system consists of three elements: a transformer, which takes your standard 120-volt house current and reduces it to 12 volts, then a run of cable buried just a couple of inches under the surface, then the fixtures. The transformer is plugged into any standard outdoor outlet, and since the cable is charged so little, you can cut, splice, and manipulate it without worrying about the shocking potential related to line-voltage wiring. That’s one reason most homeowners put these together on a weekend instead of calling an electrician.
Transformer capacity is more important than most people realize. Add the wattage of all the lights on a run, then choose the transformer which is rated approximately 25% higher than your daily requirement.
A run of ten 4-watt LED fixtures consumes only 40 watts, so even with a 60-watt configuration you’ll have a lot of margin and room for future additions, if at all required.
Oversize your transformer, or the lights on the far end of the run will appear noticeably dull because of an occurrence called voltage drop, as more load than the wire can support. LED has pretty much dominated here, and rightly so.
A new LED path light consumes a tiny bit of the energy an old halogen did, stays cool, and lasts tens of thousands of hours. According to industry statistics, LED fixtures typically consume about 80 percent less energy than halogen fixtures, so you could have a full path lit all night for just pennies. If your old halogen path and spread were draining your wallet, changing the bulbs or the fixtures can often pay for themselves.
Spacing and Placement That Prevents Trips
The worst error in layout would be to line path lights in a straight row at a fixed interval, say six inches between them, as is the case with runway markers. Although busy, this design wastes fixtures, and you still end up with dark gaps.
So you would get much better results just by spacing per the light spread of your chosen fixture, which should be about 6 to 10 feet for standard path lights. The idea is that the light pools are touching or just slightly overlapping so you don’t have areas where the lighting is too much or places where there’s none in between.
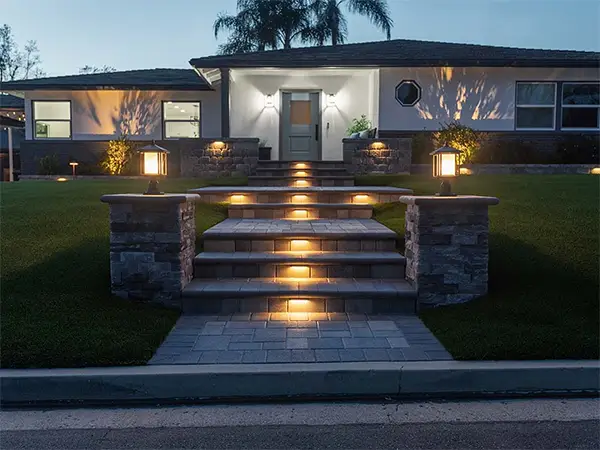
Avoid hazards by paying extra attention to stairs and level changes, as these are usual spots for falls. Place a dedicated fixture at the beginning and the end of a staircase, or lights positioned in the risers to guide visually and make the steps easier to navigate.
You can use the same strategy at corners. Putting a light at the turning point outside a curve rather than inside helps someone who is about to reach there know the direction of the path.
The height and angle make a big difference in the overall ambience of the lighting. A light post between 45-60 cm tall will illuminate everything up to 6- 7 m and is perfect for large spaces, whereas low bollards will just light up the area around the pedestrian pathway as you would like. If possible, install lights that cast downwards and are shielded from view. For instance, a hooded light that directs the glow on the ground instead of facing it out at eye level gets rid of glare that is counterproductive to seeing and keeps your peace with the neighbors.
Choosing Fixtures for Your Yard and Climate
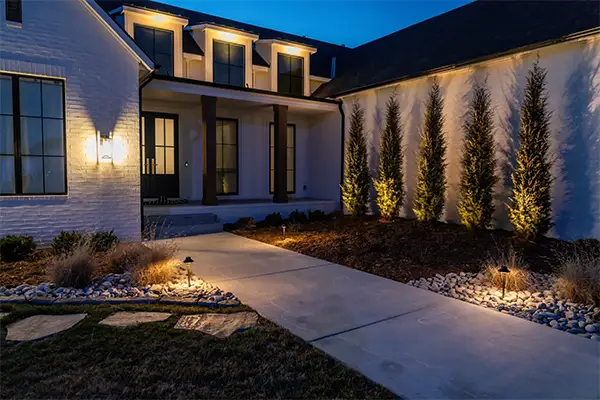
Each way has different requirements – no one size fits all here. A nicely arranged stone sidewalk around the house can handle modern, bright LED lights, whereas a trail covered in mulch and surrounded by flowers is enhanced by gentle, warm light that blends with the surrounding green throughout the day. What’s important here is the temperature of light.
If your main surface is wood, stone, or brick, then selecting a warm white around 2700K to 3000K is a good idea because it highlights the texture and also provides a friendly feel.
Still, if your intention is to create an up-to-date, clean garden or yard, cooler 4000K light is the way to go.
Making or losing a substantial portion of budget is all down to craftsmanship. Low-quality plastic outdoor lanterns are prone to crack after repeated freezing and melting. When it comes to a few seasons pass, their paint will be completely gone, too.
But materials like cast brass, copper, or powder-coated aluminum may require some more investment initially, but once installed, they are resistant to weather and will not deteriorate for a long time.
Besides that, brass naturally acquires a very attractive patina, which for some people is more appealing than the original factory finish. That means, if you live in areas with very cold winters or where salt air affects the coast, it will simply not be prudent to save yourself just 15 dollars on each fixture here.
For a walkway that needs to accommodate foot traffic and hold up against weather, options like Touchstone Commercial lights are worth a look when you want fixtures built to a sturdier standard than the disposable stuff at the big-box store.
Whatever brand you choose, remember to check the IP rating, which lets you know how well the fixture resists dust and water. Anything at IP65 or above is sealed well enough for direct exposure to rain and sprinklers, and that rating is the most reliable predictor of how long a fixture survives outdoors.
What It Costs and How Long It Takes
A simple path lighting system of DIY nature for lighting a short walkway is from $150 to $400 based on the number of lights and their qualities, whereas the transformer and wires take up most of that portion. The price of a fixture varies from $15 for an affordable LED unit to $60 or $80 for a heavy brass fixture. About $40-80 will be spent on wire and junction boxes, while a reasonably priced transformer with either a timer or a photo sensor is in the neighborhood of 40-100.
The manual work part is absolutely manageable. Most of the homeowners can manage the process of layout, connection, and burying the system of a 35-yard path in one or two days, given the hardness or rootedness of the soil. You should probably try laying out the fixtures on the ground first and even living with your layout overnight before committing. This way, you’ll prevent unnecessary dug holes because your arrangement will probably not look quite the way you expected once the time changes and you’re actually using the path.
Timers and photocells are the small improvements that make a big difference every day. A photocell turns the lamp on when it gets dark, and the lamp goes off when it is getting bright automatically, so the path is lit if someone uses it without you needing to remember it. Some of them prefer the timer to switch off the lights a few hours before dawn, which helps to conserve energy usage and minimize light pollution during the time there is no activity outside.
The Difference It Makes to Actually Live With
With the security calculations aside, a beautifully lit backyard path alters your perception of the area. When people put in lighting for the walkway, they tend to enjoy more time outside because a garden that seemed like a black hole after midnight now opens up and seems like a continuation of the house. The visitors can find a way to the back porch on their own, children can cross the garden safely without a flashlight, and the whole neighborhood looks more polished from the inside out.
The security factor also plays a huge part, although it is often exaggerated. A gently lit path doesn’t turn your home into a military base, but when the house is definitely maintained and doesn’t have any dark patches at all in the surroundings, it becomes a less attractive place for burglars than the darkness behind the house.
The aim is not to floodlight everything, most of which will only anger the people who live here. It is simply a yard that seems to be designed, and one can safely navigate at any time of the day or night.
If you’re going to do installation during this period, walk the track after dark one evening with a flashlight from your phone and jot down precisely the places where you stop to take more care or even slow your pace. The areas where you forgot were a step there, the protruding root that can catch a toe, the turn that takes you by surprise- those are the fixture locations. Everything other than what I just said is a matter of details; you still have time to install a couple of lights next season after you see the behaviour of the first installation given a full weather cycle.
FAQs
Other than the lights, how much expense would the extra gear cost me?
About $40-80 will be spent on wire and junction boxes, while a reasonably priced transformer with either a timer or a photo sensor is in the neighborhood of $40-$100.
Where should I ideally place the lights to avoid hazards?
Place a dedicated fixture at the beginning and the end of a staircase, or lights positioned in the risers to guide visually and make the steps easier to navigate.
Which kind of light should I choose for wood materials?
If your main surface is wood, stone, or brick, then selecting a warm white around 2700K to 3000K is a good idea because it highlights the texture and also provides a friendly feel.



Smart Fall Yard Planning Ideas for Families With Kids
[…] sits a couple of inches under the surface and can be cut and spliced without an electrician, though low-voltage walkway lighting fixture spacing is what separates an even wash from a runway of bright dots with dark gaps between them. Size the […]